
Tex-Mex nachos 7 Best Ways to Make Them Extra Crispy
Did you know that nearly 60% of home cooks say their nachos turn soggy within minutes of baking, even when they follow a recipe exactly? That’s the frustrating truth behind one of the most loved party foods. Many people assume soggy nachos are unavoidable once toppings go on but that belief couldn’t be more wrong. With the right technique, Tex-Mex nachos can stay crunchy, layered, and deeply flavorful from the first bite to the last.
This recipe is worth your time because it doesn’t rely on restaurant equipment or complicated tricks. Instead, it’s built on real kitchen experience things you can do in a normal home oven with ingredients you already know. Whether you’re cooking for a family movie night, a game-day spread, or just craving something bold and comforting, these Tex-Mex nachos deliver maximum crunch, balanced toppings, and true Tex-Mex flavor without stress.
Table of Contents
Ingredients List
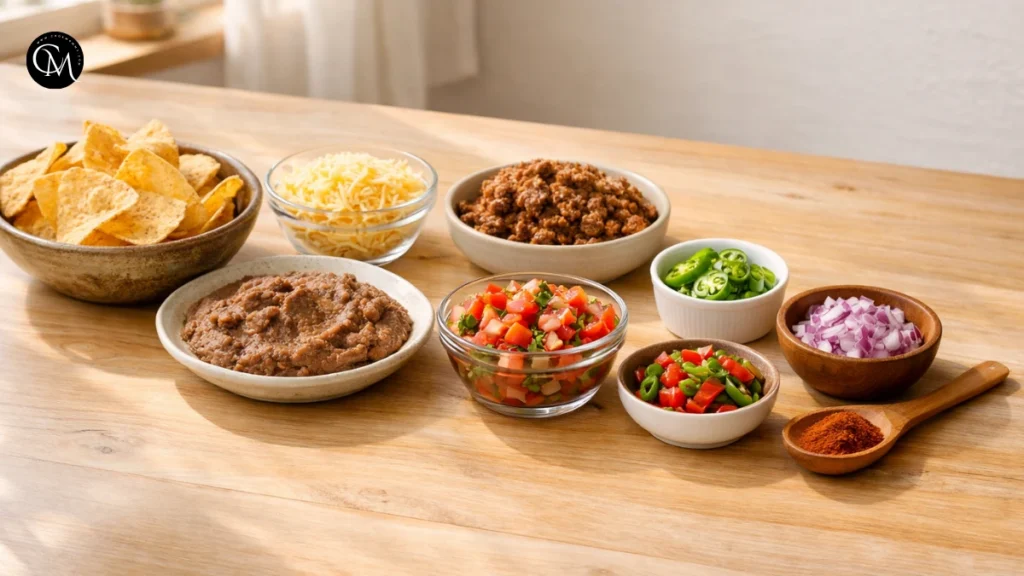
A great plate of nachos starts with thoughtful ingredient choices. Every layer matters, especially when crispiness is the goal.
Base Ingredients
- Thick corn tortilla chips (restaurant-style or sturdy scoops)
Tip: Thin chips break and steam too quickly. - Shredded cheese (cheddar, Monterey Jack, or a blend)
Pre-shredded works, but freshly grated melts smoother. - Cooked protein (ground beef, shredded chicken, or seasoned beans)
Flavor Builders
- Refried beans or black beans, warmed and lightly mashed
- Fresh salsa or pico de gallo, drained
- Pickled jalapeños or fresh chili slices
- Red onion, finely diced
- Smoked paprika or cumin (optional, for depth)
Optional Toppings (Added After Baking)
- Sour cream or Greek yogurt
- Guacamole or sliced avocado
- Fresh cilantro
- Lime wedges
Substitution ideas:
- Swap beef for lentils or mushrooms for a vegetarian version
- Use dairy-free cheese shreds for lactose-free needs
- Choose low-sodium beans to control salt levels
Timing
- Preparation Time: 15 minutes
- Cooking Time: 10–12 minutes
- Total Time: About 25–30 minutes
Compared to many loaded nacho recipes that take 45 minutes or more, this method keeps things fast while improving texture. Shorter bake time = crispier chips.
Step-by-Step Instructions
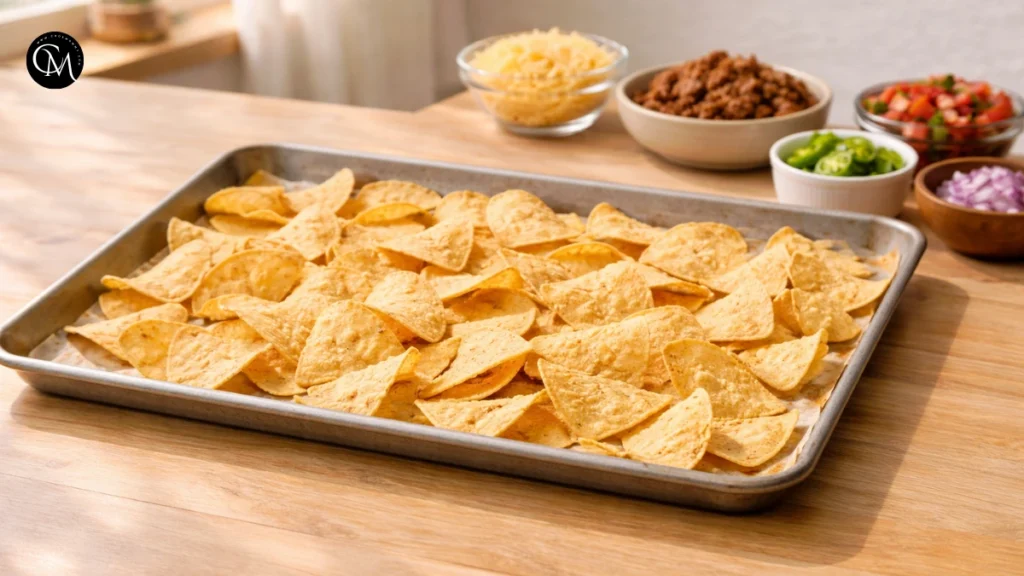
Step 1: Choose the Right Pan (Yes, It Truly Matters)
Reach for a wide, rimmed metal baking sheet, not a casserole dish or deep pan. Spread the chips out so they sit in a single, open layer with some breathing room around them.
Why this matters:
Nachos rely on dry heat and airflow to stay crisp. Deep dishes trap steam as toppings heat up, which quickly softens chips from underneath. A flat baking sheet lets hot air circulate freely, allowing the chips to toast instead of absorb moisture. If you’re cooking for a crowd, it’s better to use two pans than to crowd one.
Step 2: Preheat the Oven Properly (No Shortcuts Here)
Set your oven to 220°C (425°F) and allow it to fully preheat before the nachos go in. This usually takes at least 10 minutes.
Pro tip:
A hot oven is one of the biggest secrets to crispy Tex-Mex nachos. Starting in a properly heated oven means the chips begin crisping immediately, before the cheese and toppings release moisture. Putting nachos into a lukewarm oven gives steam time to build almost guaranteeing sogginess.
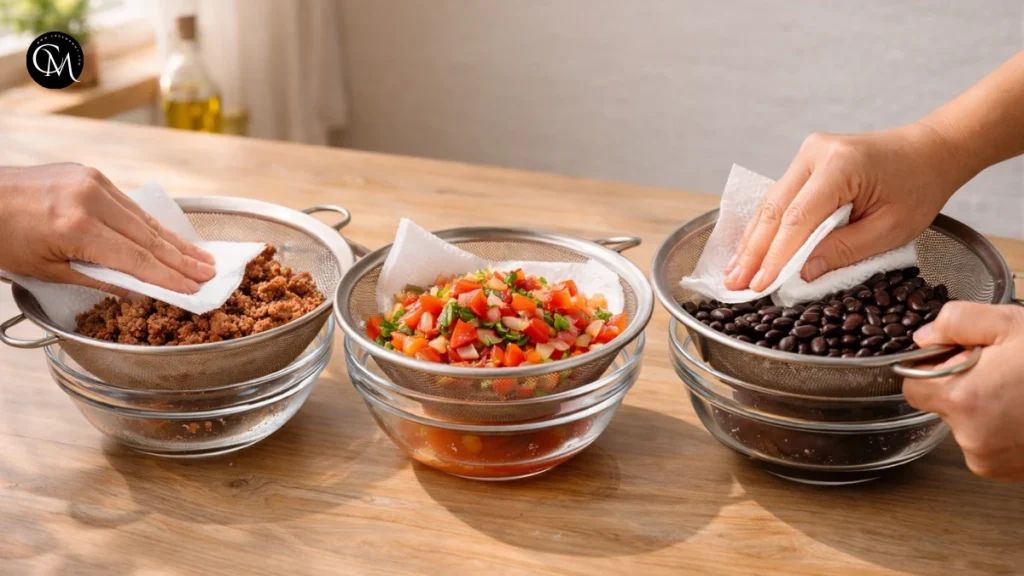
Step 3: Dry Your Wet Ingredients Thoroughly
Drain salsa, beans, and cooked meat well using a sieve or colander. If they still look glossy or watery, gently pat them dry with paper towels.
Why this works:
Moisture is the main enemy of crisp nachos. Even flavorful liquids like salsa juice or bean broth turn into steam once heated. Removing excess liquid concentrates flavor and protects the texture of the chips. Well-drained toppings taste bolder and keep the base crunchy longer.
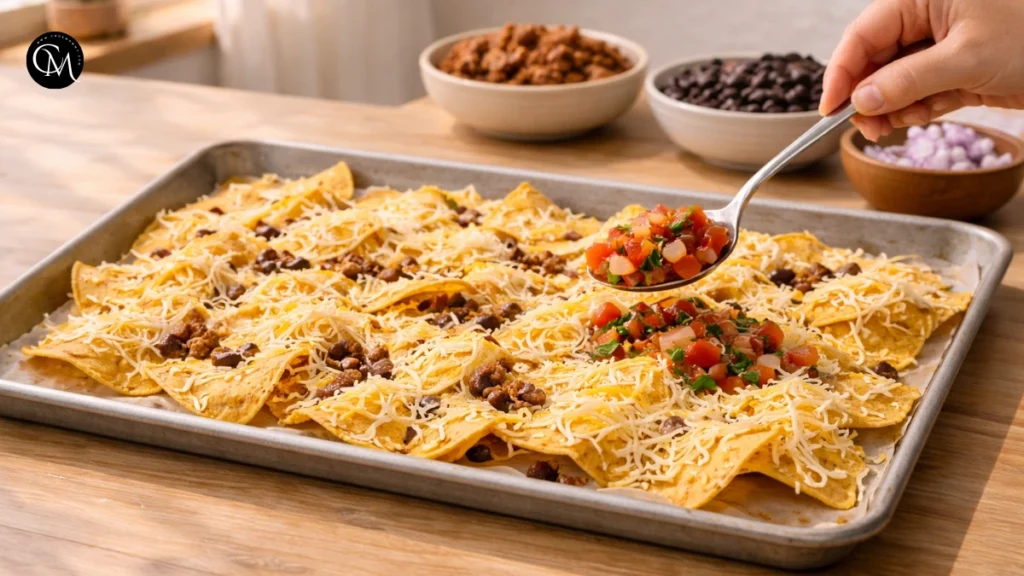
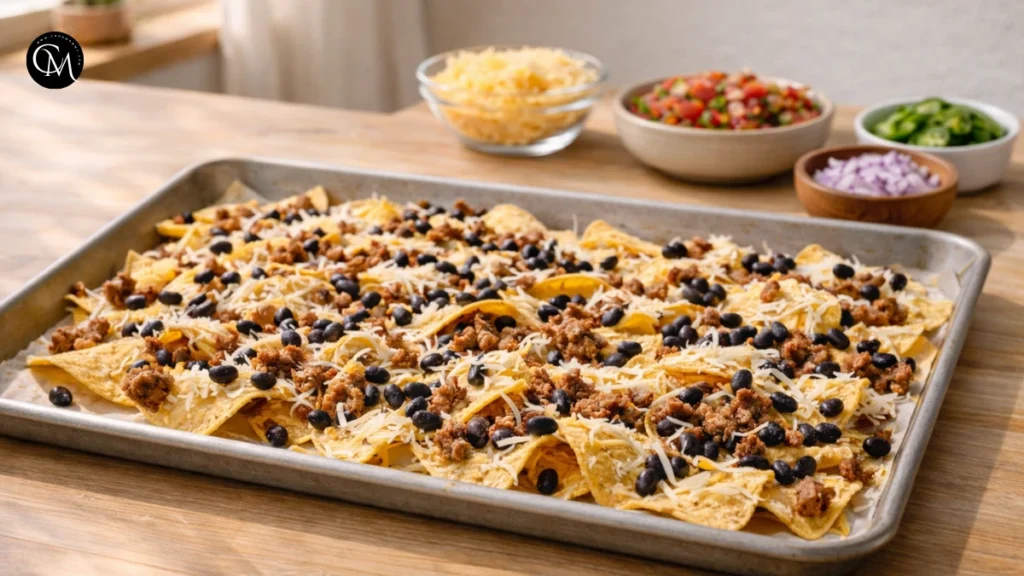
Step 4: Build in Thin, Even Layers
Start with one even layer of tortilla chips. Sprinkle shredded cheese directly over the chips, then add a light scatter of protein and beans. If needed, repeat one more time only.
Experience-based advice:
Nachos are not a lasagna. Piling too high leads to broken chips, cold centers, and uneven melting. Two thin layers ensure that every chip gets cheese, every topping heats evenly, and nothing collapses under its own weight. Less layering equals better balance and better crunch.
Step 5: Use Cheese as a Moisture Barrier
Always add cheese before any moist toppings like beans, meat, or salsa.
Why it matters:
As the cheese melts, it forms a protective seal over the chips. This barrier slows moisture from soaking in, buying you precious crunch time. Skipping this step allows wet toppings to sit directly on chips, which softens them from the moment they hit the oven.
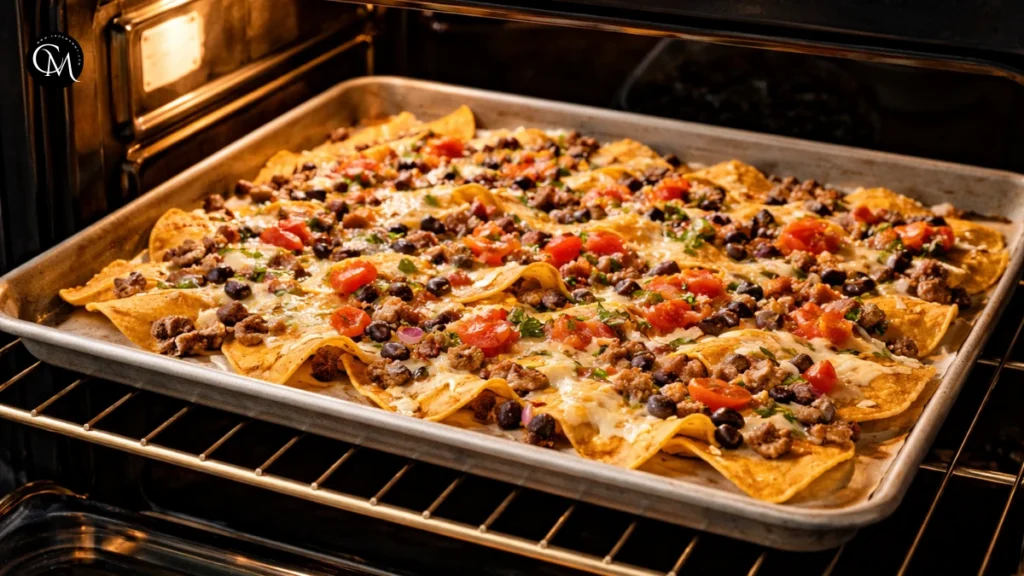
Step 6: Bake Fast and Watch Closely
Place the tray on the middle rack and bake for 10–12 minutes, just until the cheese is fully melted and bubbling around the edges.
Do not overbake:
Once the cheese melts, your job is done. Leaving nachos in the oven too long dries out the chips and causes cheese to separate, turning greasy instead of stretchy. Pull them out while they still look vibrant and glossy carryover heat will finish the job.
Overcooking dries the chips and makes cheese greasy instead of stretchy.
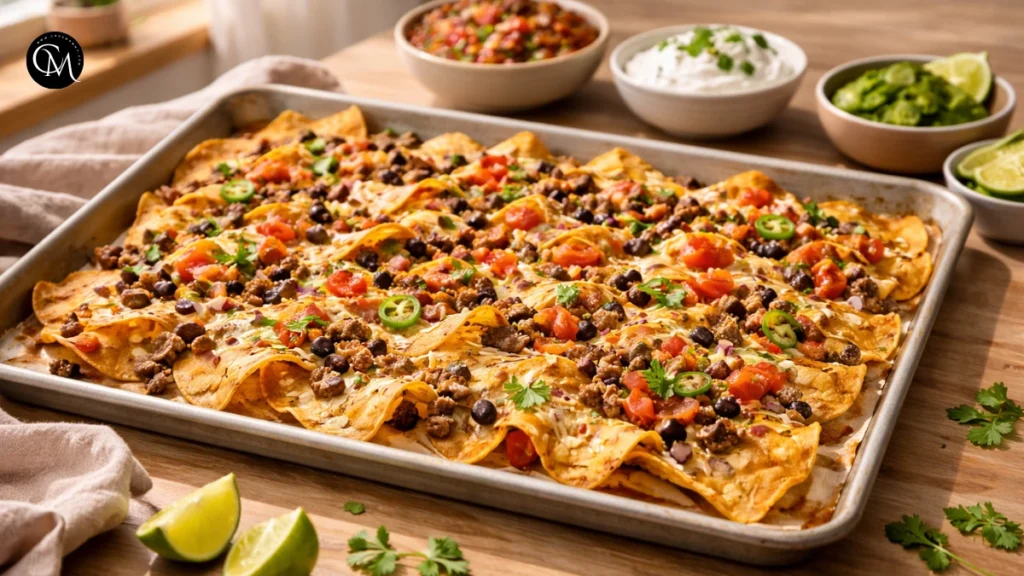
Step 7: Finish Cold, Fresh, and Bright
Remove from oven and immediately add cold toppings like sour cream, guacamole, and herbs.
Texture contrast is key:
Hot + cold keeps nachos exciting and prevents late-stage sogginess.
Nutritional Information (Approximate, per serving)
- Calories: 420–480 kcal
- Protein: 18–22 g
- Carbohydrates: 35–40 g
- Fat: 22–26 g
- Fiber: 5–7 g
- Sodium: Varies by cheese and chips used
These Tex-Mex nachos are indulgent but balanced when portioned well. They offer protein, fiber, and satisfying fats, making them more filling than many snack-style foods without crossing into “heavy meal” territory.
Healthier Alternatives for the Tex-Mex nachos
You don’t have to sacrifice flavor to make smarter choices.
Lower Sodium
- Use low-sodium chips and beans
- Flavor with spices instead of extra salt
Whole-Grain Options
- Look for whole-grain or stone-ground corn chips
- Add extra beans or grilled vegetables for fiber
Dairy-Free or Gluten-Free
- Use certified gluten-free tortilla chips
- Choose plant-based cheese alternatives that melt well
For Kids or Seniors
- Reduce spice and skip jalapeños
- Cut toppings smaller for easier chewing
The structure of this recipe stays the same only the ingredients shift.
Serving Suggestions for the Tex-Mex nachos
- Serve nachos straight from the baking tray for a casual, shareable feel
- Pair with sparkling water, iced tea, or lime soda for balance
- Turn leftovers into nacho-stuffed wraps or taco fillings the next day
For gatherings, consider setting up a nacho bar where toppings are added individually. This keeps chips crisp longer and lets everyone customize their plate.
Common Mistakes to Avoid
- Using thin chips – they collapse under heat and toppings
- Overloading with sauce – flavor is good, puddles are not
- Baking too long – melted cheese ≠ browned cheese
- Skipping the cheese barrier – a guaranteed soggy result
- Stacking too high – crunch needs exposure, not depth
Most soggy nacho complaints come from one of these issues.
Storing Tips for the Tex-Mex nachos
Nachos are best fresh, but you can prep smart:
- Store toppings and chips separately
- Refrigerate cooked protein and beans up to 3 days
- Reheat chips alone in the oven to re-crisp before rebuilding
Avoid microwaving assembled nachos it softens everything instantly.
Conclusion
Crispy, satisfying Tex-Mex nachos aren’t about luck they’re about technique. By choosing sturdy chips, managing moisture, layering thoughtfully, and baking hot and fast, you turn a common snack into something truly crave-worthy. This recipe respects real home kitchens and real appetites, offering flexibility without sacrificing texture or flavor.
Whether you’re feeding a crowd or treating yourself, these nachos deliver bold taste, reliable crunch, and endless customization. Try them once using these seven methods, and you’ll never accept soggy nachos again.
If you make this recipe, leave a comment and share your favorite topping combo. And don’t forget to subscribe for more practical, experience-driven recipes that actually work at home.
FAQs
1. Can I make Tex-Mex nachos ahead of time?
You can prep ingredients ahead, but assemble and bake just before serving for best texture.
2. What cheese melts best for nachos?
Cheddar and Monterey Jack melt well. Avoid very aged cheeses they separate.
3. How do I keep Tex-Mex nachos warm without getting soggy?
Keep them in a low oven (90–100°C) uncovered for short periods.
4. Can I make these in an air fryer?
Yes, in small batches. Use a tray insert and cook at 190°C for 5–6 minutes.
5. Are Tex-Mex nachos spicy?
They can be mild or hot. Spice level is fully adjustable.
6. What protein works best for kids?
Shredded chicken or seasoned ground turkey with mild spices.
7. How do restaurants keep nachos crispy?
They use high heat, wide pans, and minimal moisture exactly what this recipe does.
Tried it before ?
There are no reviews yet. Be the first one to write one.