
Cream Cheese Heart Danishes: 6 Best Valentine Dessert Ideas
Did you know that studies show over 65% of home bakers avoid making pastries because they assume the process is too technical or time-consuming? That belief keeps many people from trying recipes like Cream Cheese Heart Danishes, which are actually among the easiest bakery-style desserts you can make at home. With store-bought puff pastry and a simple cream cheese filling, you can create elegant, flaky treats that look impressive but require minimal effort.
These danishes are worth making because they blend beauty, flavor, and practicality in one recipe. The buttery layers bake up crisp and golden, while the creamy center adds richness and balance perfect for Valentine’s Day, brunch spreads, or a heartfelt homemade gift. You don’t need professional skills or specialty tools, just a few smart techniques and attention to detail.
Whether you’re baking for loved ones or treating yourself, this recipe delivers reliable results, flexible ingredient options, and a presentation that feels special every time.
Table of Contents
Ingredients List
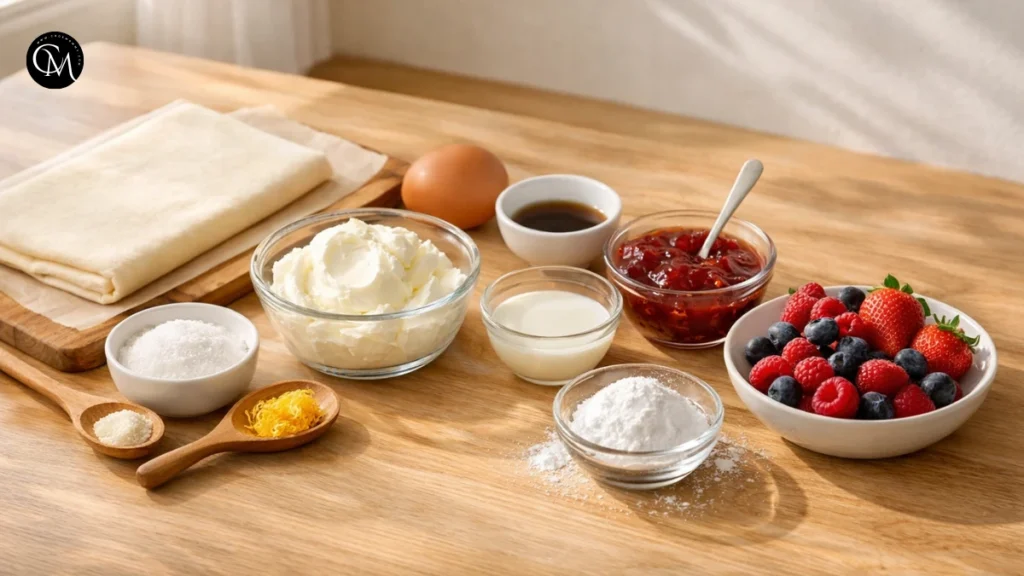
Creating memorable danishes starts with simple ingredients used thoughtfully. Each element contributes to texture, flavor, and presentation.
For the pastry base:
- 1 sheet puff pastry (thawed but cold)
- 1 egg (for egg wash)
- 1 tablespoon milk
For the cream cheese filling:
- 200 g cream cheese, softened
- 3 tablespoons sugar
- 1 teaspoon vanilla extract
- 1 teaspoon lemon zest (optional but brightens flavor)
Optional toppings:
- Strawberry jam or raspberry preserves
- Powdered sugar for dusting
- Fresh berries
- Chocolate drizzle
Substitution ideas:
- Use Greek yogurt cream cheese for lighter texture
- Use honey or maple syrup instead of refined sugar to add a more natural, mellow sweetness.
- Use dairy-free cream cheese for lactose-free versions
- Swap puff pastry with homemade sweet dough if preferred
Each ingredient plays a role: puff pastry gives flakiness, cream cheese provides richness, and citrus adds balance.
Timing
Planning your baking time ensures stress-free preparation.
- Preparation time: 15 minutes
- Assembly time: 10 minutes
- Baking time: 18–22 minutes
- Total time: About 40–45 minutes
Compared to traditional laminated pastries, which can take several hours, this recipe is significantly quicker and ideal for last-minute Valentine treats.
Step-by-Step Instructions for the Cream Cheese Heart Danishes
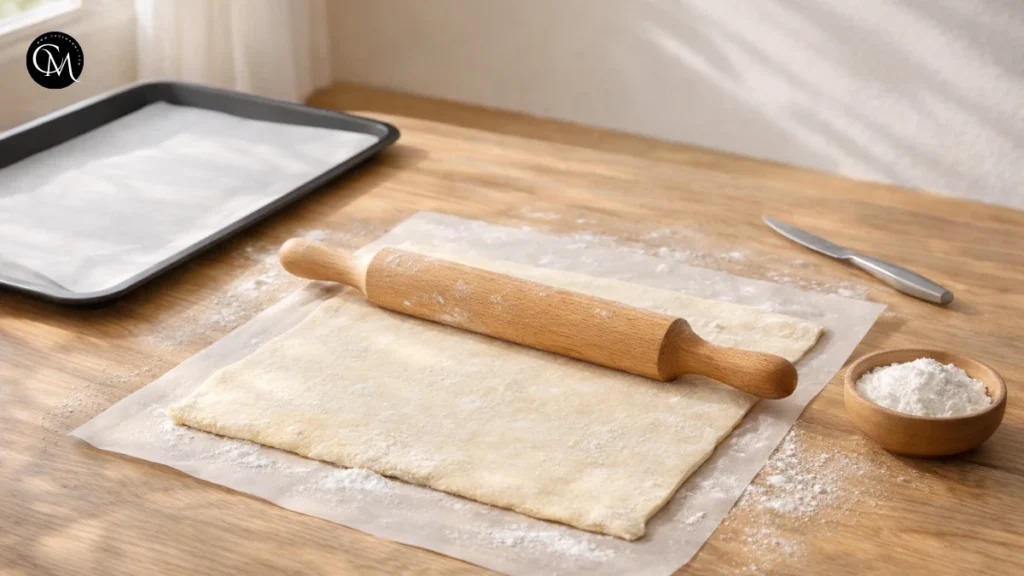
Step 1 – Prepare the pastry properly
Preheat your oven to 190°C (375°F) and line a baking tray with parchment paper to prevent sticking and ensure even browning. Remove the puff pastry from the fridge only when ready to use cold dough is essential for flaky layers. Lightly roll it out on a floured surface just enough to smooth cracks and even the thickness. Avoid over-rolling, as this compresses the layers and reduces puff. If the pastry becomes soft or sticky, return it to the fridge for 5 minutes before continuing.
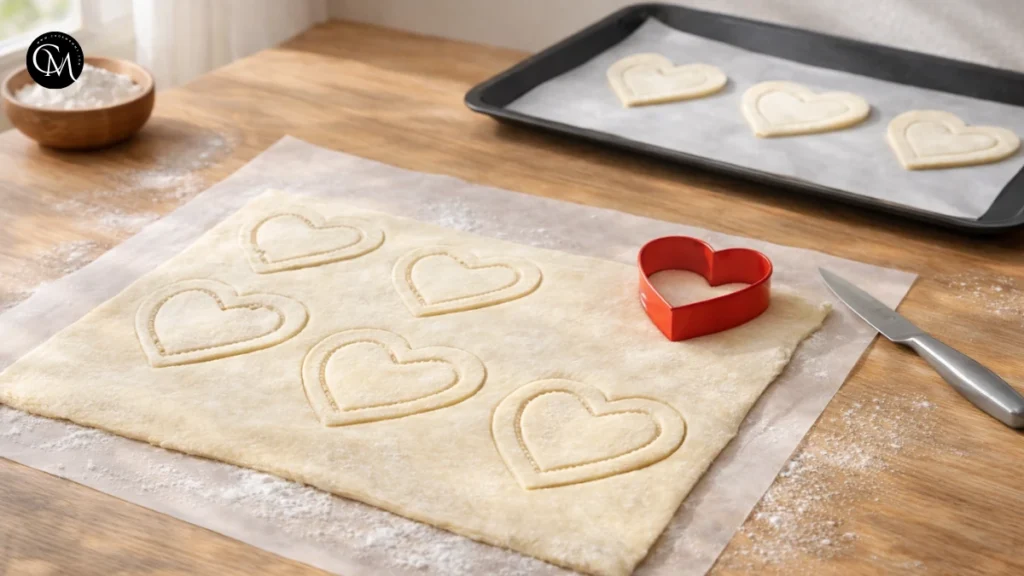
Step 2 – Cut and shape the hearts
Use a heart-shaped cutter (or a sharp knife) to cut even shapes. For each heart, gently score or cut a smaller heart inside, leaving about a 1 cm border around the edges. Do not cut all the way through the base layer this border helps the pastry rise around the filling and keeps the center defined. For a more dimensional look, lightly press the inner shape with a fork instead of cutting it fully.
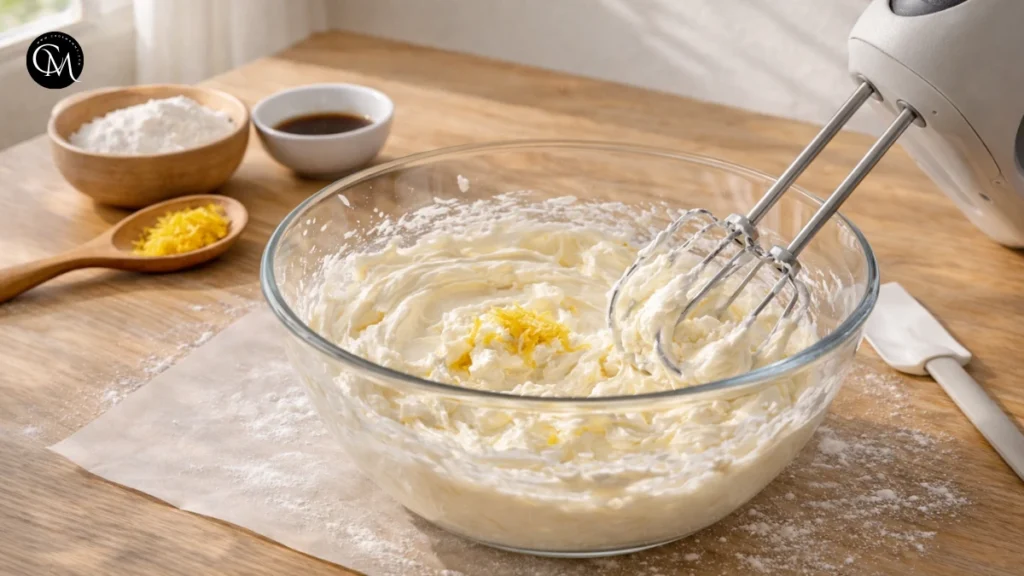
Step 3 – Prepare the cream cheese filling
In a mixing bowl, combine softened cream cheese, sugar, vanilla extract, and lemon zest. Use a spatula or hand mixer on low speed until smooth and creamy. The goal is a spreadable texture not runny. Overmixing introduces air and can make the filling puff unevenly during baking. Taste and adjust sweetness or citrus based on your preference.
Step 4 – Assemble the danishes with precision
Place the shaped pastry hearts on the prepared tray, spacing them slightly apart. Spoon about 1–2 teaspoons of filling into the center of each heart. Spread gently, keeping the edges clean so they rise properly. If the filling reaches the border, it may leak during baking and prevent the pastry from puffing evenly.
Step 5 – Apply egg wash for a bakery finish
Whisk the egg with milk until fully blended. Using a pastry brush, lightly coat only the outer edges of the hearts. Avoid brushing the filling area. Brushing the edges creates a rich golden finish and a delicate shine like you’d see in a bakery display.
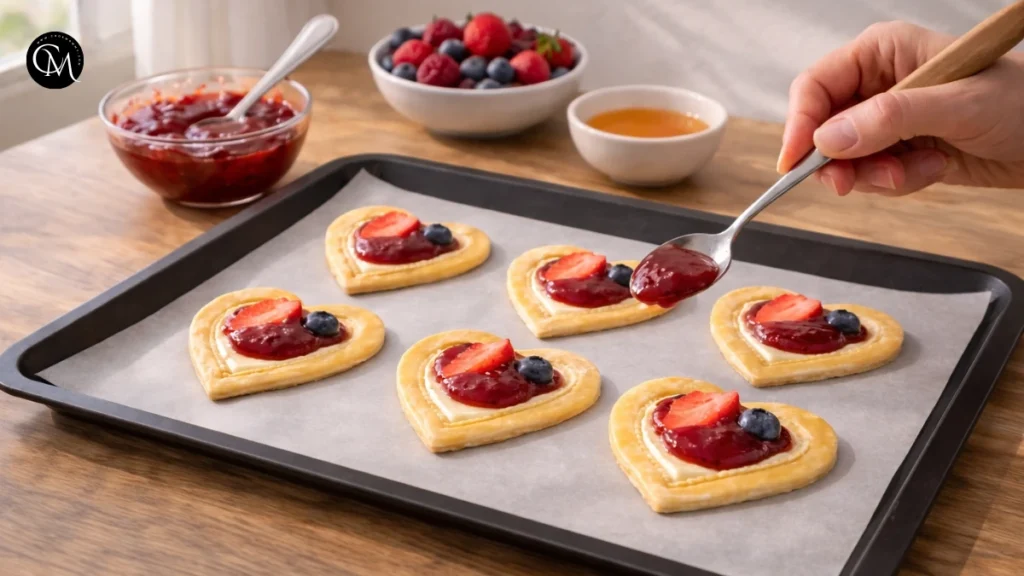
Step 6 – Add toppings thoughtfully
Top the cream cheese center with a small spoonful of jam, a berry slice, or a drizzle of chocolate. Keep toppings light too much moisture can weigh down the pastry and make it soggy. Choose flavors that complement the cream cheese, like strawberry, raspberry, or apricot.
Step 7 – Bake until perfectly golden
Bake in the preheated oven for 18–22 minutes, or until the edges are puffed and golden brown. Turn the baking tray around midway through cooking so the pastries brown evenly on all sides. You’ll know they’re ready when the pastry layers look crisp and lifted, and the filling appears set but still creamy.
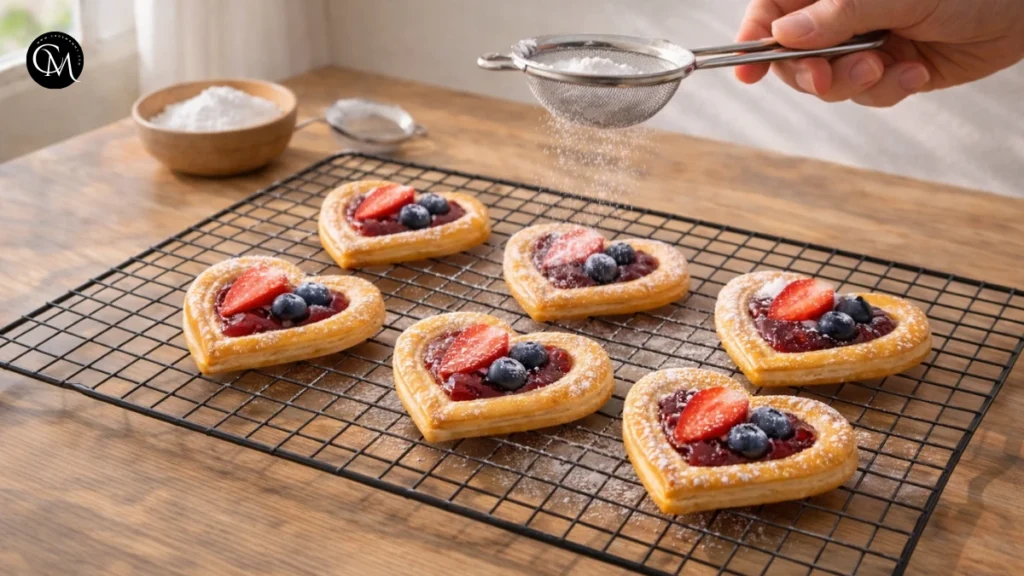
Step 8 – Cool and finish like a pro
Let the danishes cool on the tray for about 5 minutes, then transfer to a wire rack. This prevents condensation underneath and keeps the bottoms crisp. Once slightly warm (not hot), dust lightly with powdered sugar or drizzle icing. Cooling allows the filling to firm up, giving the danishes their ideal texture and clean bite.
Nutritional Information for the Cream Cheese Heart Danishes
Approximate values per danish (varies by topping and pastry brand):
- Calories: 240–280
- Carbohydrates: 24 g
- Fat: 15 g
- Protein: 4 g
- Sugar: 8–12 g
- Sodium: 180 mg
Cream Cheese Heart Danishes feel indulgent, yet they can fit into a balanced treat when enjoyed mindfully. The cream cheese adds a touch of protein and richness that helps keep you satisfied, while the puff pastry delivers the light, flaky texture and energy that make each bite comforting and enjoyable.
Healthier Alternatives for the Cream Cheese Heart Danishes
This recipe can be modified in many ways while still keeping its delicious taste and texture.
Lower sugar options:
- Use stevia blends or monk fruit sweetener
- Add mashed berries for natural sweetness
Whole-grain versions:
- Choose whole-grain puff pastry if available
- Try half whole-wheat pastry dough
Dairy-free swaps:
- Use plant-based cream cheese
- Replace egg wash with almond milk for browning
Gluten-free adaptations:
- Use certified gluten-free puff pastry
- Add cornstarch to filling for stability
For kids:
- Add banana slices or mild jam flavors
For seniors or light diets:
- Use reduced-fat cream cheese
- Serve smaller portions with fresh fruit
These swaps keep texture and taste satisfying while making the dessert more inclusive.
Serving Suggestions for the Cream Cheese Heart Danishes
Presentation transforms these danishes into memorable treats.
- Serve warm with coffee, tea, or hot chocolate
- Pair with a fresh fruit platter for balance
- Add whipped cream for brunch gatherings
- Arrange in a heart-shaped platter for Valentine’s Day
For special occasions, try:
- Drizzling white chocolate for elegance
- Serving with berry compote for contrast
- Adding edible flowers for visual appeal
A personal favorite tip: serve them slightly warm with citrus tea the acidity enhances the creamy filling beautifully.
Common Mistakes to Avoid
Even simple pastries can go wrong without attention.
- Using warm pastry
Warm dough becomes sticky and won’t puff well. Keep it cold. - Overfilling
Too much cream cheese causes overflow and soggy centers. - Skipping egg wash
Without it, pastries look pale and less appetizing. - Underbaking
Golden color indicates crisp layers. Pale pastry means undercooked interior. - Not softening cream cheese
Lumpy filling affects texture and baking consistency. - Ignoring oven temperature
Too low prevents puffing; too high burns edges before baking inside.
Storing Tips for the Cream Cheese Heart Danishes
Proper storage preserves freshness and texture.
Short-term storage:
- Keep in airtight container at room temperature for 1 day
- Refrigerate for up to 3 days
Reheating:
- Warm in oven at 160°C for 5–7 minutes
- Avoid microwave to maintain crisp pastry
Freezing:
- Freeze baked danishes up to 1 month
- Reheat directly from frozen
Prep ahead tip: Assemble danishes and refrigerate overnight before baking. Perfect for stress-free mornings.
Conclusion
Cream Cheese Heart Danishes bring together elegance, simplicity, and rich, comforting flavor in a dessert that feels special without being complicated. They’re quick to prepare, visually beautiful, and flexible enough for different tastes, dietary needs, and occasions from Valentine’s Day treats to weekend brunch or homemade gifts. The flaky pastry layers, creamy filling, and customizable toppings make every batch unique and satisfying, even for beginner bakers.
Ready to bake something memorable? Try this recipe and see how easy bakery-style pastries can be at home. If you make them, leave a comment or review to share your results and favorite variations it helps other readers and inspires new ideas. And if you love practical, experience-driven recipes like this one, subscribe for future updates and fresh baking inspiration delivered straight to your kitchen.
FAQs
1. Can I make Cream Cheese Heart Danishes ahead of time?
Yes. Assemble them the night before and refrigerate. Bake fresh in the morning for best texture.
2. Can I use homemade dough instead of puff pastry?
Absolutely. Sweet yeast dough works well and gives a softer texture.
3. Why did my danishes not puff properly?
The dough might have softened too much, or the oven temperature may not have been high enough.
4. Can I freeze unbaked danishes?
Yes. Freeze assembled pastries and bake directly from frozen, adding a few extra minutes.
5. What fruits pair best with cream cheese filling?
Strawberries, raspberries, blueberries, and peaches all complement the tangy filling.
6. How do I make them less sweet?
Reduce sugar in filling and skip powdered sugar topping. Add lemon zest for brightness.
7. Are these suitable for beginner bakers?
Definitely. Using store-bought puff pastry simplifies the process and ensures consistent results.
Tried it before ?
There are no reviews yet. Be the first one to write one.