
lemon mousse How to Make It in 5 Easy No-Bake Steps
Have you ever wondered why lemon mousse is often described as “restaurant-style,” as if it belongs only on fancy menus and not in everyday home kitchens? Many home cooks assume that mousse is fragile, overly technical, or dependent on raw eggs and precise temperatures.
That assumption keeps people from discovering one of the most rewarding no-bake desserts you can make. The truth is, a well-balanced lemon mousse is surprisingly approachable. With fresh citrus, properly whipped cream, and a few thoughtful steps, you can create a dessert that feels elegant without being stressful.
This lemon mousse recipe is worth reading because it’s designed for real life: real time constraints, real kitchens, and real ingredients. If you enjoy bright flavors, creamy textures, and desserts that don’t require turning on the oven, this guide will walk you through the process with clarity and confidence.
Table of Contents
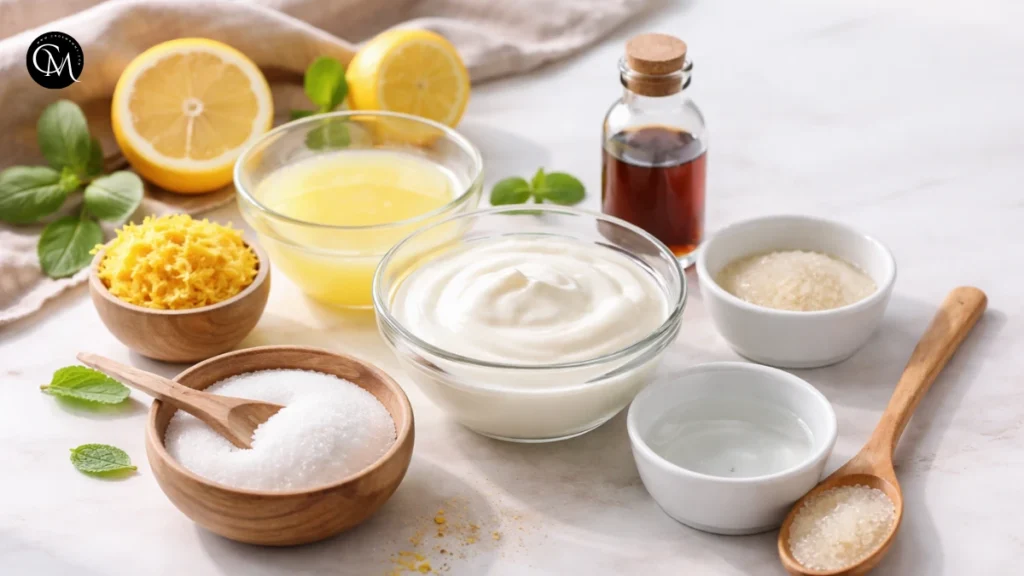
Ingredients List
This lemon mousse relies on a short ingredient list, but each component plays a clear role in the final result. Using good-quality basics makes a noticeable difference.
- Heavy cream (cold): Thick and rich, it forms the backbone of the mousse and gives it that airy, cloud-like texture
- Fresh lemon juice: Sharp, clean acidity that defines the dessert
- Lemon zest: Intensely aromatic oils that deepen lemon flavor without extra sourness
- Granulated sugar: Softens the lemon’s bite and balances acidity
- Vanilla extract: Adds warmth and rounds out the citrus notes
- Unflavored gelatin (optional): Helps the mousse hold its shape, especially for make-ahead servings or warmer rooms
- Cold water: Used only for blooming gelatin
Optional substitutions
- Honey or maple syrup can replace sugar for a softer, more rounded sweetness
- Full-fat coconut cream works well for a dairy-free version
- Lime or orange zest can be substituted for lemon zest to change the citrus profile
Timing
- Preparation time: 15–20 minutes
- Cooking/Baking time: None
- Chilling time: 1–2 hours
- Total time: About 90 minutes
Compared to baked custards, cheesecakes, or layered desserts that often take several hours, this lemon mousse is refreshingly efficient. It’s an ideal choice when you want something impressive without a long commitment.
Step-by-Step Instructions
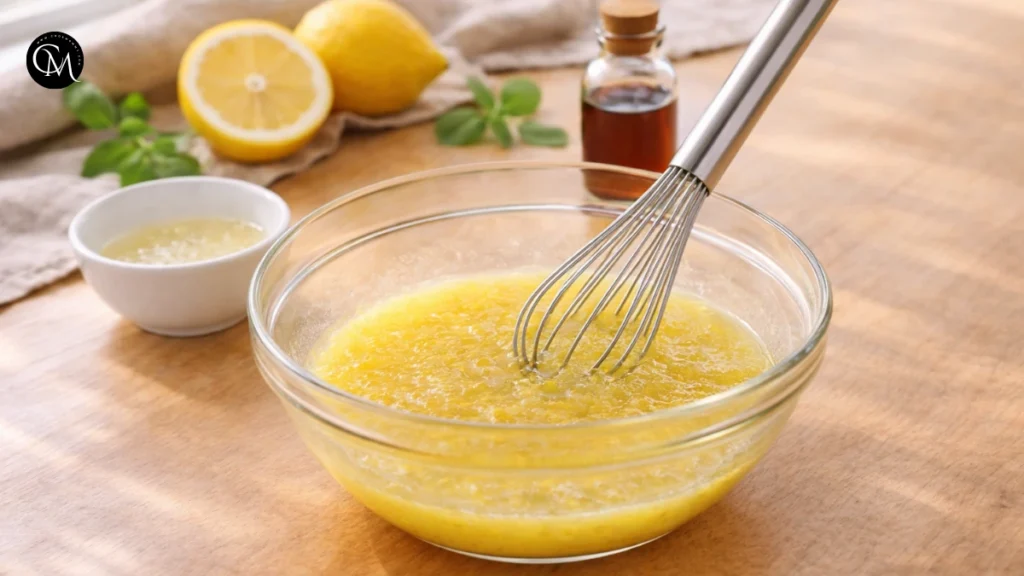
Step 1: Prepare the Lemon Base
In a medium bowl, whisk together fresh lemon juice, finely grated lemon zest, sugar, and vanilla extract until the sugar dissolves fully. The mixture should look smooth, glossy, and slightly thickened, with a fresh citrus aroma and no visible granules.
Why this matters: Undissolved sugar can create a gritty texture and distract from the creamy finish. Taking a little extra time here ensures a silky base and a more balanced flavor.
Practical tip: Taste the mixture before moving on. If it feels too sharp, add a small pinch of sugar; if it’s too sweet, a few drops of lemon juice will restore brightness.
Step 2: Bloom the Gelatin (Optional)
If using gelatin, sprinkle it evenly over cold water in a small bowl and let it sit for about 5 minutes. Once it softens and absorbs the liquid, warm it gently until fully dissolved. Stir this liquid gelatin slowly into the lemon base until completely incorporated.
Why this matters: Gelatin stabilizes the mousse and helps it hold its shape longer without making it heavy.
Practical tip: This step is especially useful when preparing the dessert ahead of time or serving it at gatherings where it may sit out briefly.
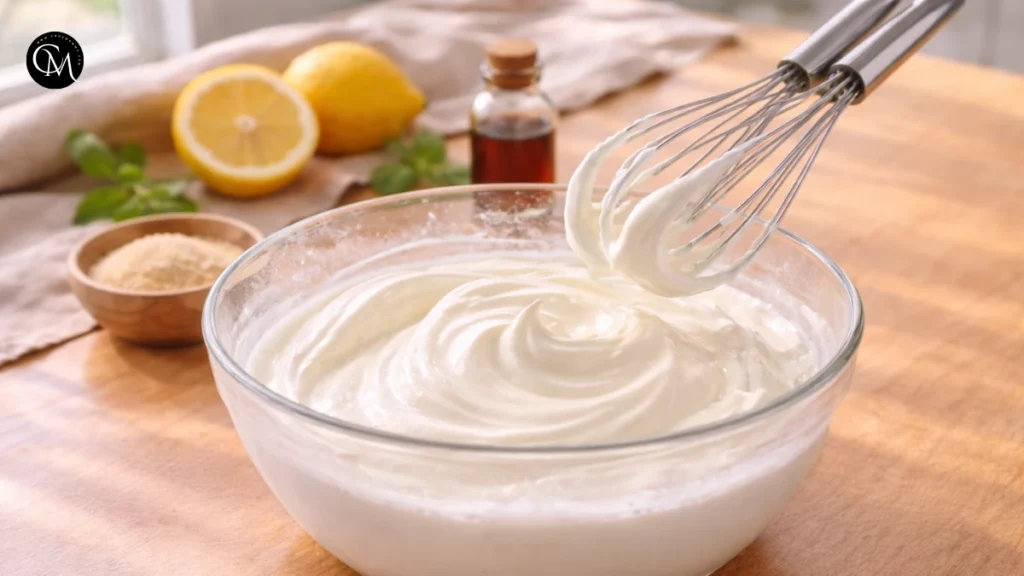
Step 3: Whip the Cream
In a chilled mixing bowl, whip cold heavy cream until soft peaks form. The cream should look smooth, airy, and slightly thick, holding gentle folds when the whisk is lifted.
Watch closely: Overwhipped cream turns dense and grainy, which can make the mousse feel heavy instead of light.
Pro tip: Stop whipping just before the cream stiffens completely. It will continue to firm slightly as you fold it into the lemon mixture.
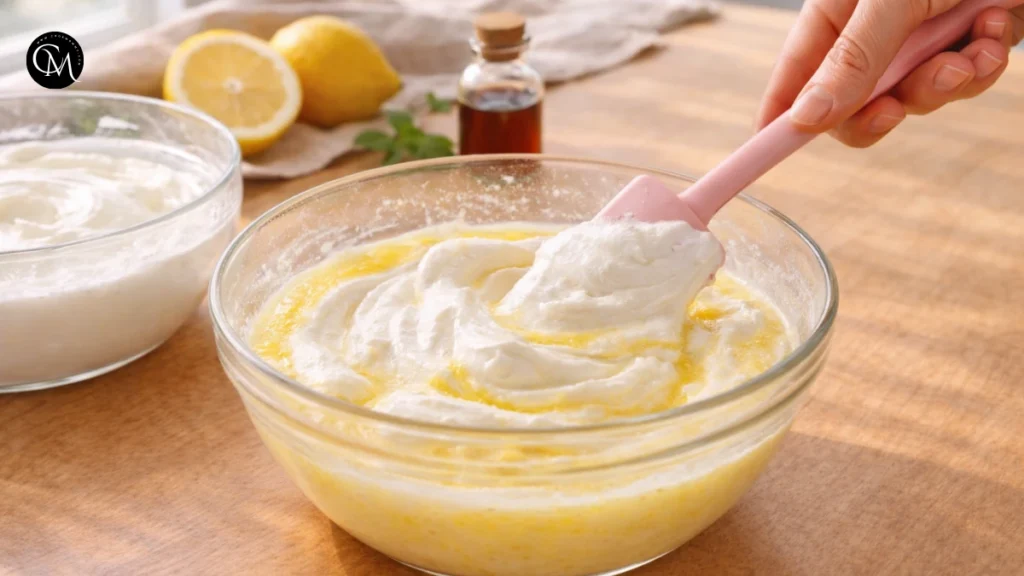
Step 4: Fold Gently
Add one-third of the whipped cream to the lemon mixture and stir lightly to loosen the texture. Then add the remaining cream in two batches, folding slowly with a spatula using wide, sweeping motions from the bottom of the bowl upward.
Why folding matters: This technique preserves the tiny air pockets created during whipping, which are essential for the mousse’s soft, airy structure.
Kitchen insight: Rushing this step or stirring too vigorously can collapse the mixture and lead to a dense result.
Step 5: Chill and Set
Spoon the mousse into individual glasses, ramekins, or a serving bowl. Smooth the surface gently, then chill for at least one hour until softly set and creamy.
Why this matters: Chilling allows the flavors to blend and the texture to stabilize, creating a smooth and refreshing finish.
Pro tip: Cover loosely with plastic wrap or a lid to protect the citrus aroma from refrigerator odors. For best results, serve slightly chilled rather than very cold to keep the texture soft and delicate.

Nutritional Information
Approximate values per serving:
- Calories: 260
- Fat: 20 g
- Carbohydrates: 18 g
- Sugar: 15 g
- Protein: 3 g
This lemon mousse is a rich dessert meant to be enjoyed in moderate portions. Its strong citrus flavor allows smaller servings to feel satisfying without being heavy.
Healthier Alternatives for the lemon mousse recipe
- Lower sugar: Replace half the sugar with monk fruit or a stevia blend
- Dairy-free: Use chilled full-fat coconut cream and skip gelatin
- Gluten-free: Naturally gluten-free with no changes
Families often appreciate the flexibility of this recipe. Children usually prefer slightly less zest, while seniors enjoy the smooth, easy-to-eat texture that doesn’t feel dense.
Serving Suggestions for hte lemon mousse
- Serve in small glasses topped with fresh berries
- Add crushed cookies or toasted nuts for contrast
- Pair with herbal tea or espresso after dinner
- Use as a filling for tart shells, crepes, or cake layers
For gatherings, serving lemon mousse in individual portions makes presentation neater and far more convenient. Guests can simply pick up a glass or ramekin without the need for slicing or plating, which keeps the dessert table organized and stress-free.
Common Mistakes to Avoid
- Using bottled lemon juice, which dulls flavor
- Overwhipping the cream
- Skipping the chilling time
- Adding warm gelatin directly to whipped cream
- Over-sweetening before tasting
Each of these mistakes directly impacts either the texture, the flavor balance, or both. Small oversights like rushing the chilling time, overmixing the cream, or misjudging sweetness can quickly turn a light, silky mousse into something dense, runny, or overly sharp.
Storing Tips for the lemon mousse
- Room temperature: Not recommended
- Refrigeration: Store covered for up to 3 days
- Freezing: Possible, but texture may soften after thawing
Keep the mousse tightly covered and cold to preserve freshness and aroma.
Conclusion
This lemon mousse shows that elegant desserts don’t need complicated steps or professional equipment. With fresh ingredients, thoughtful technique, and no baking required, you can create a dessert that feels light, creamy, and refined while still being practical for everyday life.
It’s versatile enough for family dinners, special occasions, or make-ahead planning, and flexible enough to adapt to different dietary needs. If you’ve ever hesitated to try mousse at home, this recipe is a perfect place to start. Give it a try, share your experience in the comments, and subscribe for more dependable, kitchen-tested recipes designed for real home cooks.
FAQs
Can I make lemon mousse without gelatin?
Yes. The mousse will be softer and more delicate, but still creamy and enjoyable. Whipping the cream properly and chilling the mixture well will help it hold its shape naturally.
How long does lemon mousse last in the fridge?
It keeps well for up to three days when stored in an airtight container. For the best flavor and texture, enjoy it within the first 24–48 hours.
Why is my mousse runny?
This usually happens when the cream is underwhipped or the mousse hasn’t chilled long enough. Make sure soft peaks form before folding, and allow enough time in the refrigerator to set.
Can I make this ahead for guests?
Yes, lemon mousse is perfect for preparing in advance. Make it up to 24 hours before serving, keep it covered, and add toppings just before presenting for the freshest look.
Is lemon mousse safe for children?
Yes. This version contains no raw eggs, making it a gentle, family-friendly dessert with a light citrus flavor that most children enjoy.
Can I adjust the lemon flavor?
Absolutely. Add more zest for a brighter, more intense citrus taste, or reduce it for a milder, smoother profile. A small touch of sugar can also soften sharp acidity.
Can I use other citrus fruits?
Yes. Lime adds a sharper tang, orange creates a sweeter profile, and grapefruit offers a slightly bitter, refreshing twist. The same method works well for all of them.
Tried it before ?
There are no reviews yet. Be the first one to write one.