
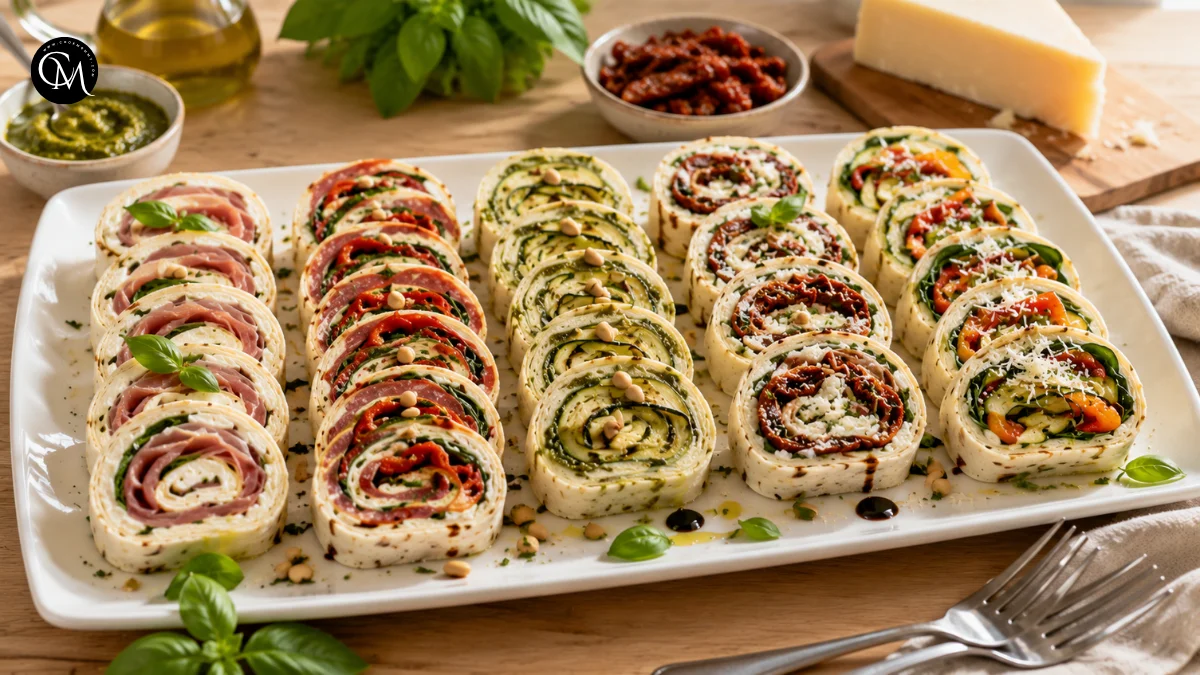
Italian Sushi: How to Make 5 Delicious Fusion Bites
If party hosts typically plan several small appetizers per guest, why serve one predictable starter when a single recipe can deliver five different flavors? Italian Sushi turns familiar Italian ingredients into colorful, bite-sized rolls that are easy to serve, customize, and enjoy without chopsticks.
Despite the name, this recipe does not attempt to recreate traditional Japanese sushi. Instead, it borrows the rolled shape and neat presentation while using ingredients such as prosciutto, mozzarella, basil, roasted peppers, zucchini, pesto, and creamy ricotta. The result is a playful fusion appetizer with recognizable Mediterranean flavors.
I first made these rolls when I needed a cold starter that looked impressive but did not require hours in the kitchen. Since then, Italian Sushi has become one of my favorite choices for summer lunches, holiday platters, potlucks, and relaxed family gatherings. This guide explains how to prepare five variations while keeping every bite balanced, firm, and easy to pick up.
Table of Contents
Italian Sushi Ingredients List
The following ingredients make approximately 25 to 30 pieces, depending on how thickly you slice the rolls.
For the main rolls
- 5 large flour tortillas or soft flatbreads
- 200 grams cream cheese, softened
- 150 grams ricotta cheese
- 2 tablespoons basil pesto
- 8 thin slices prosciutto
- 8 slices mild salami
- 150 grams fresh mozzarella, well drained
- 1 roasted red pepper, drained and sliced
- 1 small zucchini
- 1 cup fresh baby spinach
- 8 sun-dried tomatoes, drained and finely chopped
- 2 tablespoons grated Parmesan
- 1 tablespoon fresh basil, finely chopped
- 1 teaspoon lemon zest
- Freshly ground black pepper
- A small pinch of salt
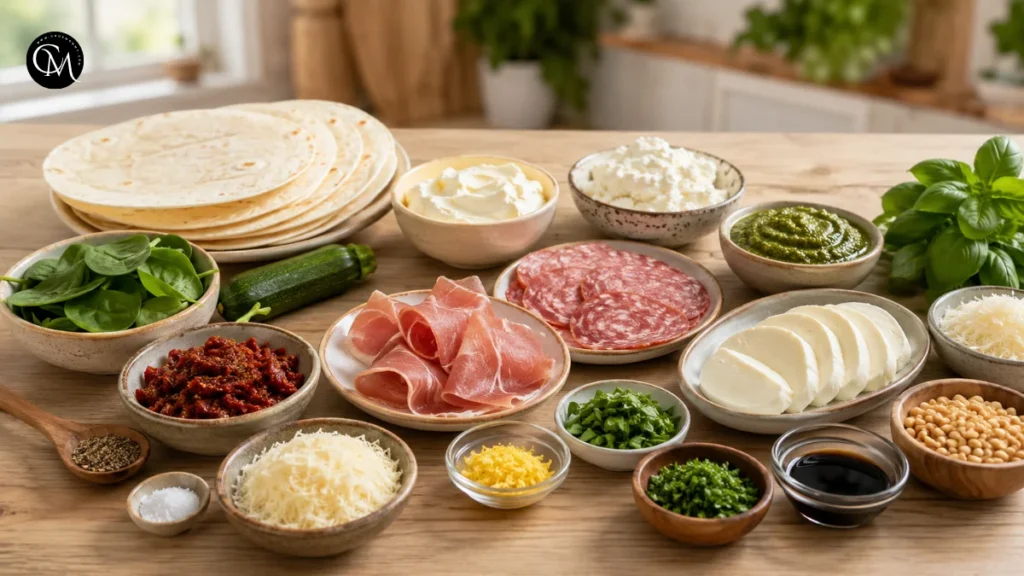
Optional finishing ingredients
- Balsamic glaze
- Extra-virgin olive oil
- Toasted pine nuts
- Chopped parsley
- Grated Parmesan
- Fresh basil leaves
Useful substitutions
Replace prosciutto with turkey slices for a milder option. Grilled eggplant can replace meat in the vegetarian rolls, while dairy-free cream cheese works well for guests avoiding milk products.
Soft tortillas are the easiest wrapper, but thin piadina, lavash, or large spinach wraps also work. Avoid thick bread because it can crack while rolling and make the finished pieces feel heavy.
The best Italian Sushi begins with ingredients that are flavorful but not excessively wet. Drain mozzarella, roasted peppers, and sun-dried tomatoes carefully before assembling the rolls.
Timing
- Preparation time: 30 minutes
- Cooking time: 8 minutes
- Chilling time: 30 minutes
- Total time: 1 hour 8 minutes
- Yield: Approximately 25–30 bites
Most of the work involves slicing, mixing, and rolling. Only the zucchini requires a few minutes of cooking. Compared with baked appetizers, these fusion bites require less active cooking and can be prepared well before guests arrive.
Step-by-Step Instructions
Step 1 – Prepare the ingredients
Begin by bringing the cream cheese to room temperature. Softened cheese spreads evenly without tearing the tortilla, while cold cream cheese tends to pull and create holes.
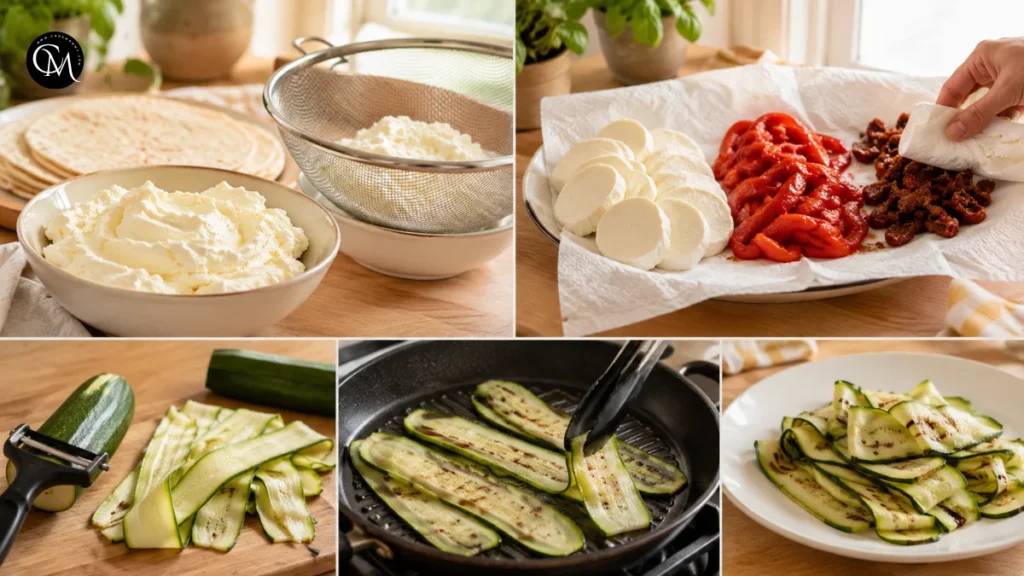
Drain the ricotta in a fine sieve for 10 to 15 minutes. Pat the mozzarella, roasted pepper, and sun-dried tomatoes with paper towels. Moisture control is especially important because wet fillings can make Italian Sushi soft and difficult to slice.
Use a vegetable peeler to cut the zucchini lengthwise into thin ribbons. Heat a dry skillet over medium heat and cook the ribbons for about 30 seconds per side. They should become flexible without turning mushy.
Allow all warm ingredients to cool before assembly. Placing warm zucchini against cream cheese can loosen the filling and create slippery rolls.
Step 2 – Build the flavor base
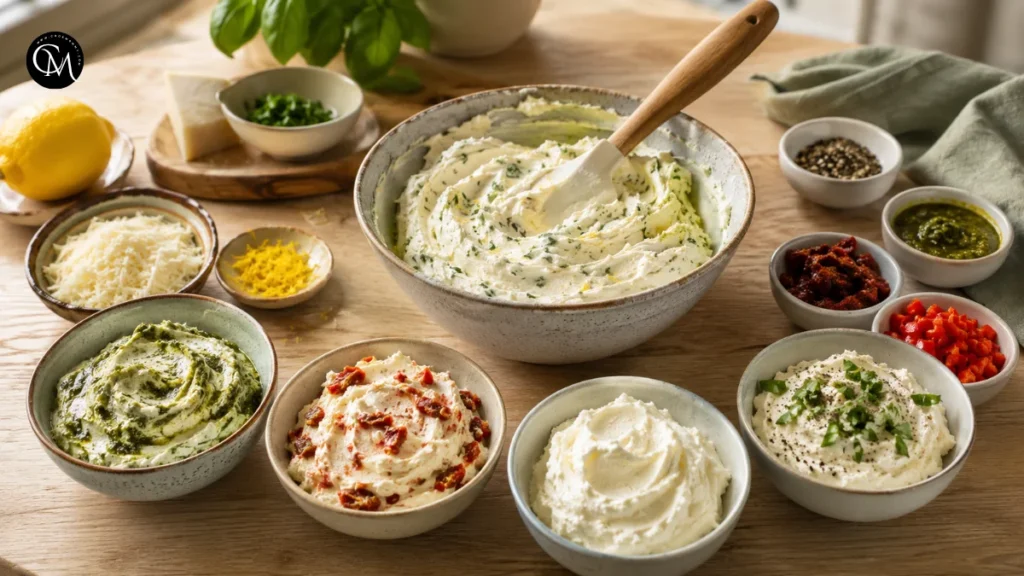
In a medium bowl, combine the softened cream cheese, drained ricotta, grated Parmesan, lemon zest, chopped basil, black pepper, and a very small pinch of salt.
Mix until smooth but not runny. The cream cheese provides structure, while ricotta makes the filling lighter. Parmesan adds savory depth, and lemon zest cuts through the richness without adding excess liquid.
Divide the mixture among five small bowls. This allows each roll to have a slightly different character.
For the first bowl, stir in pesto. Add chopped sun-dried tomatoes to the second. Keep the third plain for the prosciutto roll. Mix finely chopped roasted pepper into the fourth, and add extra basil and black pepper to the fifth.
This simple flavor base keeps the Italian Sushi cohesive while allowing every variation to taste distinct.
Step 3 – Cook and arrange the main ingredients
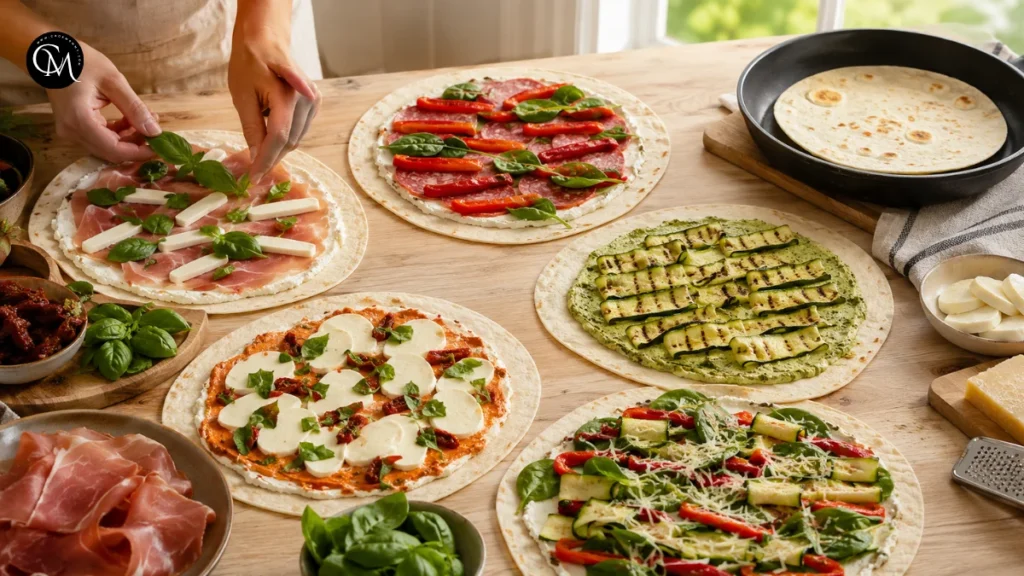
Lay the tortillas flat on a clean work surface. Warm them for approximately 10 seconds in the microwave or a few seconds in a dry skillet. They should be flexible, not hot.
Spread each tortilla with one flavored cheese mixture, leaving a border of about one centimeter around the edges. An overly thick layer can squeeze out during rolling, so aim for a smooth, even coating.
Create five combinations:
- Prosciutto and basil: Add prosciutto, fresh basil, and thin mozzarella strips.
- Salami and roasted pepper: Layer salami with roasted pepper and a little spinach.
- Pesto zucchini: Arrange grilled zucchini ribbons over the pesto filling.
- Sun-dried tomato and mozzarella: Add chopped tomatoes, mozzarella, and basil.
- Vegetable garden roll: Use spinach, zucchini, roasted pepper, and Parmesan.
Arrange ingredients in thin layers. Large pieces may look generous, but they often create uneven rolls and cause the wrapper to split.
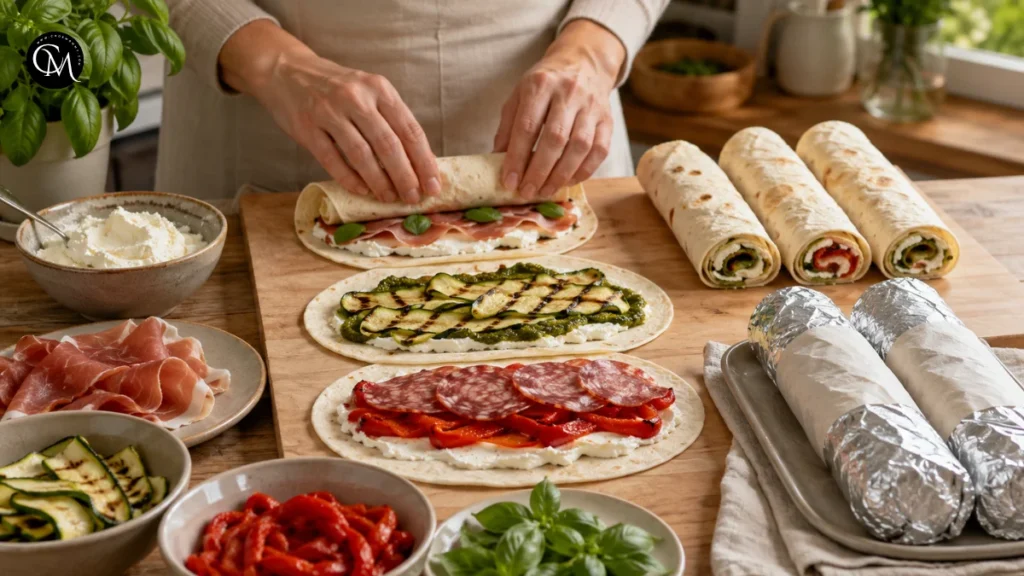
Step 4 – Combine and roll everything
Starting from the edge closest to you, roll each tortilla tightly while keeping gentle pressure on the filling. Think of rolling a firm spiral rather than folding a loose wrap.
Flavor balance matters here. Salty cured meat needs creamy cheese and fresh herbs. Rich pesto benefits from mild zucchini, while sweet roasted pepper pairs well with peppery salami.
Once rolled, place each piece seam-side down. Wrap it firmly in reusable food wrap or parchment followed by foil. Chill for at least 30 minutes.
Chilling is not merely a waiting step. It firms the cheese, helps the tortilla hold its shape, and makes Italian Sushi much easier to cut cleanly.
Step 5 – Finish and adjust the seasoning
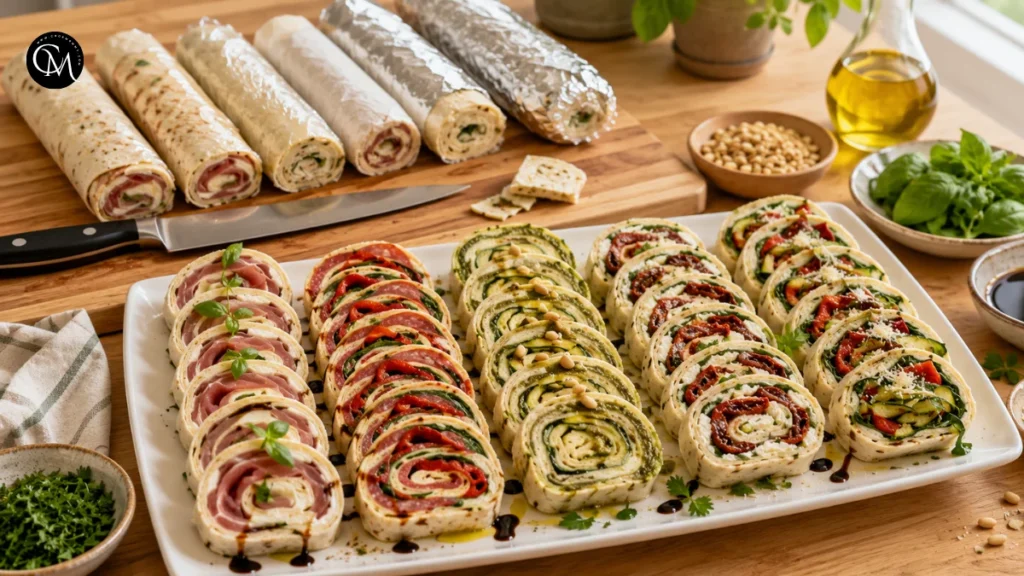
Remove the chilled rolls and trim the uneven ends. Using a sharp serrated knife or very sharp chef’s knife, cut each roll into pieces approximately two to three centimeters thick.
Wipe the blade after every few cuts. A clean blade prevents the creamy filling from smearing across the spiral.
Arrange the pieces cut-side up. Taste one from each variation before adding garnishes. Prosciutto and Parmesan already contain salt, so extra seasoning may not be necessary.
Finish the vegetable rolls with olive oil, the meat-filled rolls with a light balsamic drizzle, and the pesto rolls with toasted pine nuts. Add garnishes sparingly so the platter remains neat and the individual flavors stay recognizable.
Nutritional Information for the Italian Sushi
Approximate values per serving of five pieces:
- Calories: 310
- Protein: 13 grams
- Carbohydrates: 27 grams
- Fat: 17 grams
- Saturated fat: 8 grams
- Fiber: 3 grams
- Sodium: 680 milligrams
These values vary according to the tortilla, cheese, cured meat, and portion size used. The recipe provides protein and vegetables, but cured meats and cheese can be high in sodium. Serving the rolls with a fresh salad or raw vegetables creates a more balanced meal.
Healthier Alternatives
- To make Italian Sushi lighter, replace part of the cream cheese with additional drained ricotta or thick plain yogurt. Because this is a savory recipe, added sugar is not usually an issue. Check packaged pesto and balsamic glaze, however, as some brands contain added sweeteners.
- Choose whole-grain tortillas to increase fiber. They are slightly less flexible than white tortillas, so warm them briefly before rolling.
- For a gluten-free version, use certified gluten-free wraps. Corn tortillas are usually too small and may crack, so large gluten-free wraps made with rice, cassava, or legumes are more practical.
- For dairy-free rolls, use a thick plant-based cream cheese and replace mozzarella with grilled vegetables or a firm dairy-free alternative. Select vegan pesto or make your own without Parmesan.
- For children, use turkey, mild cheese, cucumber, and finely shredded carrots. For older adults, choose softer fillings and cut the pieces slightly smaller. Anyone watching sodium intake can use fresh chicken, grilled vegetables, and reduced-sodium cheese instead of cured meat.
Serving Suggestions for the Italian Sushi
- Serve Italian Sushi on a large white platter so the colorful spirals remain the visual focus. Group each flavor separately and identify them with small cards, especially when serving vegetarian, gluten-free, or dairy-free guests.
- For a summer lunch, pair the rolls with tomato salad, marinated olives, and chilled sparkling water with lemon. For a party, add bruschetta, roasted nuts, grapes, and small mozzarella skewers.
- I also like serving these bites beside warm tomato sauce for dipping. The contrast between chilled rolls and gently warmed sauce makes the platter feel more substantial.
- I also like serving these bites beside warm tomato sauce for dipping. The contrast between chilled rolls and gently warmed sauce makes the platter feel more substantial.
- For individual appetizers, place three pieces on small plates with arugula and a few drops of balsamic glaze. This presentation works particularly well for showers, birthdays, and casual dinner parties.
Common Mistakes to Avoid
- Using wet ingredients Fresh mozzarella, roasted peppers, and ricotta can release considerable moisture. Drain and pat them dry to prevent soggy tortillas.
- Adding too much filling A thick filling layer makes rolling difficult. Use enough to cover the surface without creating heavy pockets.
- Skipping the chilling time Cutting immediately after rolling often produces flattened, messy pieces. A minimum of 30 minutes helps the rolls become firm.
- Using a dull knife A dull blade presses down instead of slicing through. Use a sharp knife and clean it frequently.
- Over-seasoning the filling Prosciutto, salami, pesto, and Parmesan are naturally salty. Taste before adding extra salt.
- Preparing the platter too early The complete Italian Sushi rolls can be made ahead, but slicing them many hours in advance exposes more surface area and may dry the edges.
Storing Tips for the Italian Sushi
- Store whole, uncut rolls tightly wrapped in the refrigerator for up to 24 hours. Slice them shortly before serving for the cleanest appearance and freshest texture.
- Leftover pieces can be stored in an airtight container for up to two days. Place parchment between layers to prevent sticking. Do not freeze the assembled rolls, as cream cheese, ricotta, vegetables, and tortillas may develop an unpleasant texture after thawing.
- The cheese mixture can be prepared one day ahead. Cook and cool the zucchini in advance, but keep every component in a separate covered container.
- This recipe became one of my regular meals because it helps me turn small amounts of vegetables, cheese, and deli ingredients into a satisfying platter without making every roll identical.
Conclusion
Italian Sushi is a flexible fusion recipe that combines the attractive presentation of rolled appetizers with the comforting flavors of Italian cooking. The five variations offer something for meat lovers, vegetarians, children, and guests who prefer lighter fillings.
The key is to control moisture, spread the filling thinly, roll firmly, and allow enough chilling time before slicing. Once you understand those simple techniques, you can create your own combinations using herbs, grilled vegetables, cheeses, and proteins already in your refrigerator.
Try Italian Sushi for your next gathering, lunch, or snack platter. Leave a comment or review sharing your favorite filling combination, and subscribe for more practical appetizers, easy party recipes, and creative Mediterranean-inspired meals.
FAQs
Is Italian Sushi made with raw fish?
No. This fusion recipe uses Italian-style ingredients such as cured meat, cheese, pesto, herbs, and vegetables. It borrows the rolled presentation rather than traditional sushi ingredients.
Can I make the rolls the night before?
Yes. Assemble and wrap the rolls tightly, then refrigerate overnight. For the best appearance, wait until shortly before serving to slice and garnish them.
What is the best wrapper to use?
Large, soft flour tortillas are the easiest option. Thin piadina, lavash, spinach wraps, and flexible gluten-free wraps also work when warmed gently before rolling.
How do I stop the rolls from becoming soggy?
Drain ricotta and mozzarella thoroughly, pat vegetables dry, avoid watery sauces, and keep the assembled rolls tightly wrapped and chilled until you are ready to slice them.
Can I make Italian Sushi vegetarian?
Absolutely. Use grilled zucchini, roasted peppers, spinach, eggplant, artichokes, sun-dried tomatoes, pesto, and cheese to create flavorful vegetarian combinations with contrasting colors and textures.
How many pieces should I serve per person?
Plan three to five pieces per person when serving several appetizers. For a light lunch where the rolls are the main item, allow approximately eight pieces per guest.
What dipping sauces work best?
Warm tomato sauce, basil pesto, garlic yogurt, olive tapenade, and lightly sweet balsamic glaze all work well. Match the dip to the filling instead of serving every sauce together.
Tried it before ?
There are no reviews yet. Be the first one to write one.