
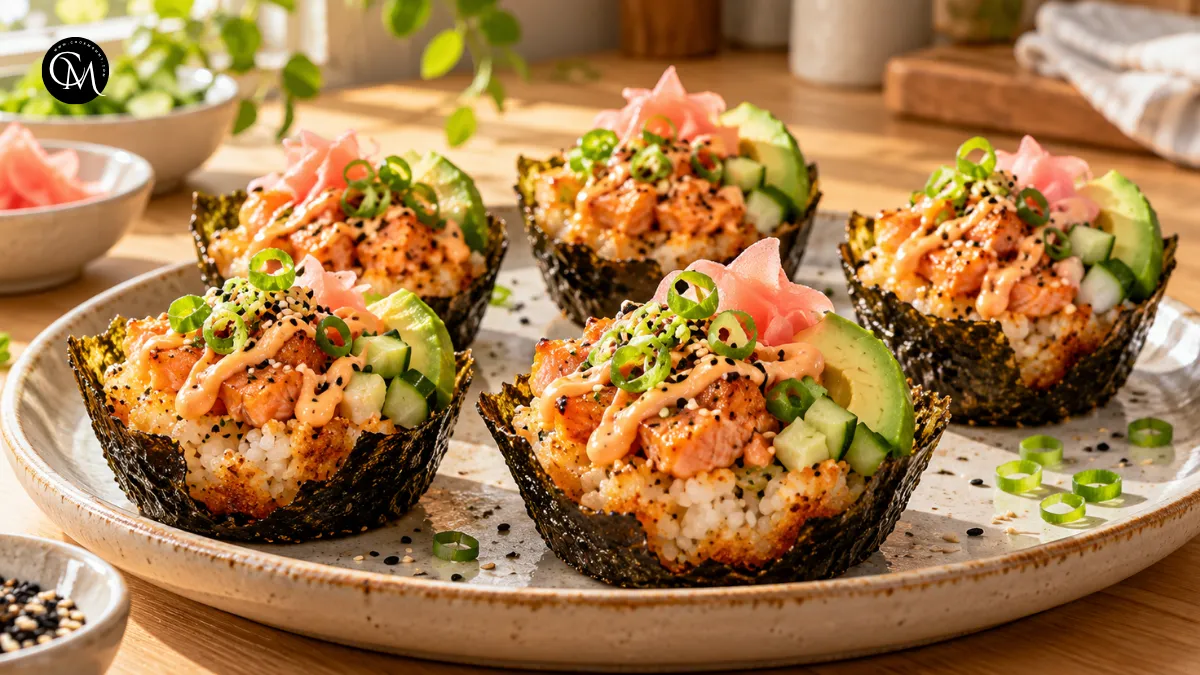
baked salmon sushi cups: 5 Best Ways to Make Them Crispy
Why salmon sushi cups Get Cris? If salmon is safely cooked at 145°F, why do some baked sushi cups come out crisp while others stay soft? The difference is usually moisture, pan contact, and layering not simply baking longer. The USDA lists 145°F (62.8°C) as the minimum internal temperature for fish, so the goal is tender salmon plus browned rice without overcooking either.
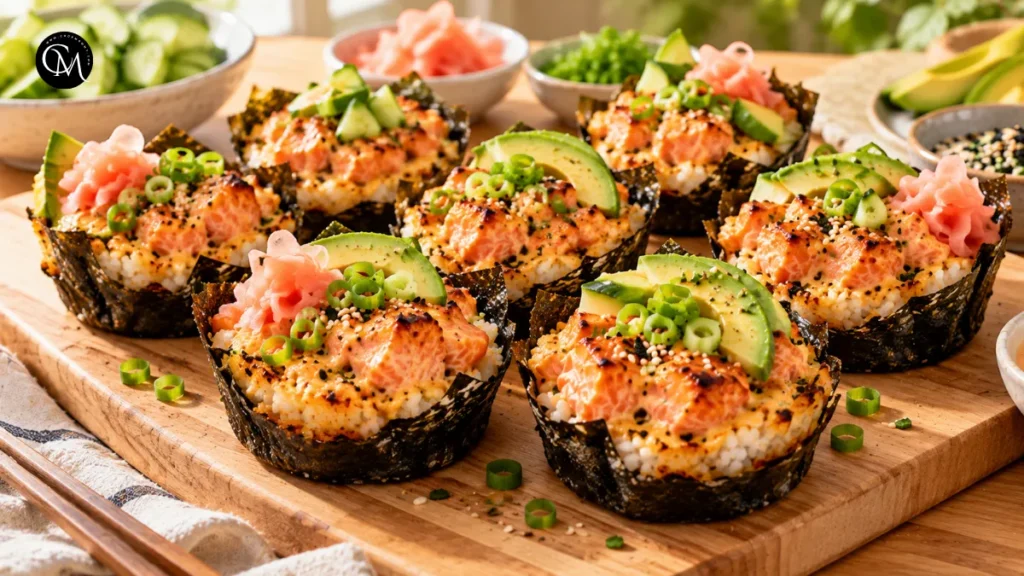
These salmon sushi cups turn familiar sushi flavors into an easy, warm meal: seasoned rice, savory salmon, creamy spicy mayo, toasted nori, and crisp edges. You do not need sushi-rolling skills; a muffin pan does the shaping.
The five best ways to improve crispness are using cooled rice, keeping the salmon mixture light, greasing the pan, avoiding overfilling, and finishing briefly with higher heat.
Table of Contents
Ingredients List
This recipe makes about 8 cups.
- 1 1/2 cups cooked sushi rice, cooled
- 12 ounces skinless salmon, cut into small cubes
- 4 nori sheets, cut into muffin-pan squares
- 2 tablespoons mayonnaise
- 1–2 teaspoons sriracha
- 2 teaspoons soy sauce
- 1 teaspoon toasted sesame oil
- 1 tablespoon rice vinegar
- 1 teaspoon sugar, optional
- 1/2 teaspoon fine salt, divided
- 1 teaspoon furikake or sesame seeds
- 1 scallion, thinly sliced
- Avocado, cucumber, or pickled ginger for serving
- Neutral oil or cooking spray
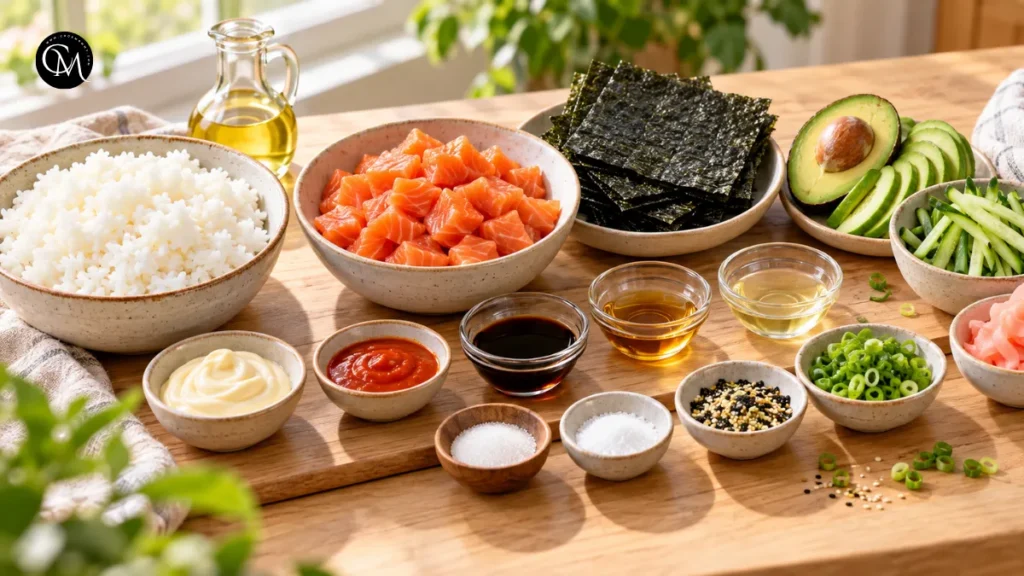
Use tamari instead of soy sauce for a gluten-free version. Canned salmon also works, but drain it thoroughly because excess liquid softens the bottoms. For mild salmon sushi cups, replace the sriracha with extra mayo and a squeeze of lime.
Short-grain sushi rice works best because its natural stickiness helps each cup hold together while creating a pleasantly chewy center and crisp exterior.
Timing
Preparation time: 15 minutes
Baking time: 16–20 minutes
Total time: about 35 minutes
This method is quicker than traditional rolled sushi because there is no rolling or careful slicing. If your rice is already cooked and cooled, assembly becomes especially fast.
For weeknight cooking, salmon sushi cups are convenient because most of the preparation can be finished while the oven preheats.
Step-by-Step Instructions
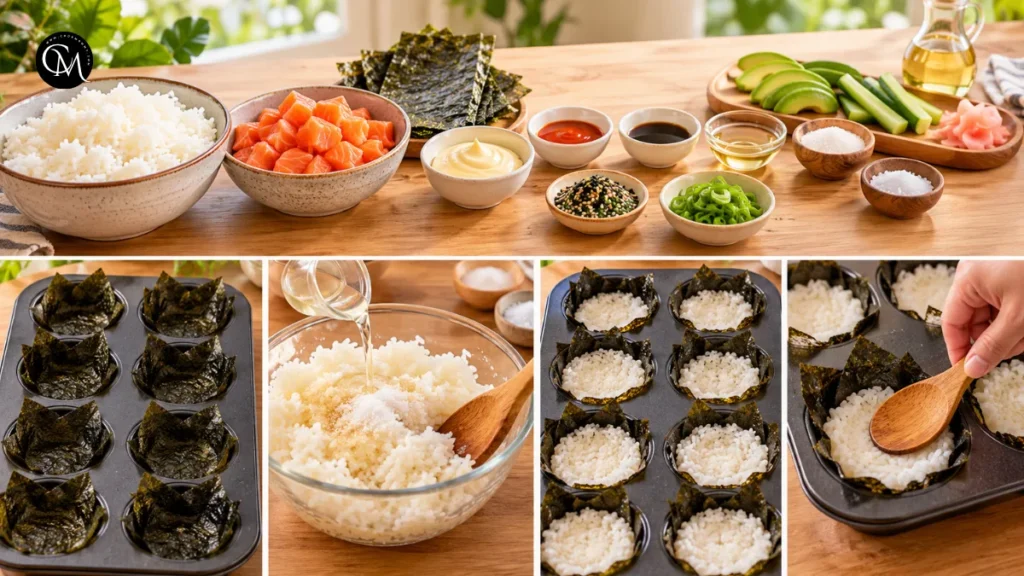
Step 1 – Prepare ingredients
Heat the oven to 400°F (205°C) and lightly grease 8 wells of a standard muffin pan. Press one nori square into each prepared well. Season the cooled rice with rice vinegar, optional sugar, and a pinch of salt. Add about 2–3 tablespoons of rice to each nori cup and press firmly across the bottom and slightly up the sides.
Cooled rice matters because freshly steaming rice traps moisture. Starting with cooler rice gives salmon sushi cups firmer edges and encourages better browning. Press firmly enough to create structure, but avoid crushing the rice into a paste. You still want the individual grains to have some texture.
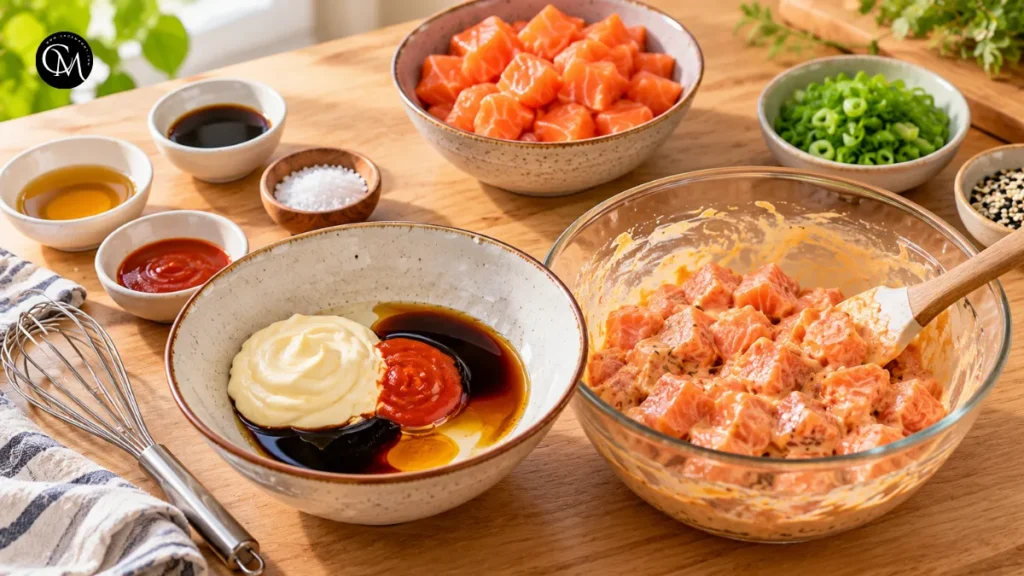
Step 2 – Build flavor base
Mix the mayonnaise, sriracha, soy sauce, sesame oil, and a small pinch of salt in a bowl. Fold in the salmon until the cubes are lightly coated. The sauce should cling to the fish rather than pool at the bottom. Too much mayonnaise or soy sauce creates extra steam, which can soften the rice.
Fat from the mayonnaise adds richness, while soy sauce provides saltiness and umami. Toasted sesame oil adds aroma, so a small amount goes a long way. Taste the sauce before adding the raw fish. That allows you to safely adjust the spice, salt, or acidity before everything is combined.
Step 3 – Cook the main ingredient
Divide the salmon mixture evenly among the cups, keeping the filling slightly below the rim. Bake for 14–17 minutes, until the salmon is cooked and the rice edges look lightly golden.
Check the thickest pieces of salmon with an instant-read thermometer when possible. Fish should reach 145°F. Avoid extending the cooking time simply to get more color. The salmon can become dry before a wet rice base becomes crisp.
For extra texture, move the muffin pan to an upper oven rack for the final 1–2 minutes. Watch carefully so the salmon sushi cups brown without burning the nori.
Step 4 – Combine everything
Remove the pan from the oven and let the cups rest for 3–5 minutes. This brief pause allows steam to escape while the rice firms slightly, making the cups easier to remove.
Run a thin knife around any sticky edges if necessary. Top with sliced scallions, sesame seeds or furikake, avocado, cucumber, or pickled ginger.
Great salmon sushi cups balance richness, acidity, salt, gentle heat, and freshness. Cucumber adds crisp contrast, while avocado provides a creamy element that works especially well with spicy salmon.
Step 5 – Finish & adjust seasoning
Taste one cup before reaching for extra sauce. A small drizzle of spicy mayo, soy sauce, or your favorite sushi sauce can be delicious, but too much liquid quickly softens the crisp exterior.
For a restaurant-style finish, season in layers. Add a little rice vinegar for brightness, sesame seeds for nuttiness, scallions for freshness, or furikake for savory depth. Serve the salmon sushi cups immediately while the rice edges and toasted nori are at their best.


Nutritional Information
Approximate values per cup, based on 8 servings:
- Calories: 180
- Protein: 10 g
- Carbohydrates: 18 g
- Fat: 7 g
- Saturated fat: 1.5 g
- Fiber: 1 g
- Sodium: 360 mg
Actual nutrition will depend on your mayonnaise, soy sauce, rice portions, salmon, and toppings.
These salmon sushi cups provide a combination of protein, carbohydrates, and fats. Sauces can increase sodium quickly, so I prefer serving additional soy sauce on the side rather than pouring it over the entire batch.
Healthier Alternatives
- For lower sugar, simply leave the sugar out of the rice seasoning. Rice vinegar and savory toppings provide enough flavor for most people without needing additional sweetness.
- For more whole grains, try a 50/50 mixture of brown short-grain rice and traditional white sushi rice. Brown rice alone tends to be less sticky, so combining the two helps maintain the cup structure.
- For gluten-free salmon sushi cups, use certified gluten-free tamari instead of regular soy sauce. Check furikake and prepared sauce labels as well, since ingredients vary by brand.
- Most traditional mayonnaise does not contain dairy, but labels should always be checked if dairy avoidance is important. Vegan mayonnaise is another easy substitute.
- For children, leave out the sriracha and offer avocado or cucumber on top. For lighter portions, serve two cups alongside a large cucumber or cabbage salad.
- For seniors or anyone who prefers softer textures, dice crunchy toppings finely and avoid leaving thick, chewy nori edges around the cups.
Serving Suggestions
- Serve salmon sushi cups with edamame, cucumber salad, miso soup, seaweed salad, or lightly pickled vegetables.
- Fresh and acidic side dishes work particularly well because they balance the creamy salmon filling instead of adding more richness.
- For parties, place the cups on a platter with small bowls of avocado, pickled ginger, sesame seeds, scallions, and spicy mayo. Guests can customize each bite without making the main dish soggy.
- For packed lunches, keep cucumber, avocado, and sauces in separate containers. Reheat the cups first, then add the cold toppings just before eating.
- You can also turn the recipe into bite-size appetizers using a mini muffin pan. Start checking them earlier because smaller salmon sushi cups generally cook and brown more quickly.
Common Mistakes to Avoid
- Using hot rice: Steaming rice releases moisture inside the muffin well. Let it cool before assembly for a firmer base.
- Adding too much sauce: The salmon should be coated, not swimming in sauce. Excess liquid creates steam and softens the rice.
- Overfilling the cups: Large mounds of salmon can cook unevenly and trap additional moisture in the center.
- Skipping the grease: A thin layer of oil encourages browning and makes the finished cups easier to remove.
- Baking too long: Once the salmon is cooked, extended baking can dry it out. Use brief upper-rack heat when you need additional browning.
- Saucing too early: Add finishing sauces right before eating so salmon sushi cups retain their crisp texture.
Storing Tips for the Recipe
- Allow leftovers to cool briefly, then refrigerate them promptly in a shallow airtight container. USDA guidance recommends refrigerating prepared foods within two hours and generally using cooked leftovers within three to four days.
- For the best texture and flavor, however, I prefer eating these within one to two days.
- Reheat salmon sushi cups in an oven or air fryer when maintaining crispness is important. A microwave is convenient, but it tends to soften the nori and rice.
- USDA guidance recommends reheating leftovers to 165°F.
- For meal prep, cook the rice and prepare the sauce a day ahead, but keep the raw salmon refrigerated separately and assemble shortly before baking.
- This recipe became one of my regular meals because the components are easy to prepare ahead, yet the finished dish feels much more special than a basic salmon rice bowl.
Conclusion
Salmon sushi cups are an easy way to enjoy the flavors of baked sushi without rolling nori or learning complicated restaurant techniques. Crisp results mainly come down to moisture control: cool the rice, keep the salmon coating light, grease the pan, avoid overfilling, and use brief high heat only when needed.
The reward is tender salmon, seasoned sushi rice, toasted nori, creamy sauce, and satisfying golden edges in every bite.
Try the recipe once as written, then customize it with avocado, cucumber, furikake, extra spice, or your favorite sushi toppings. If you make these salmon sushi cups, leave a comment or review with your favorite combination, and subscribe for more practical recipes, weeknight meal ideas, and useful kitchen tips.
FAQs
Can I make salmon sushi cups without a muffin pan?
Yes. Small oven-safe ramekins can work, although the sides may not crisp as evenly. Grease them lightly and keep the rice layer relatively thin for better browning.
Can I use canned salmon?
Yes, but drain it thoroughly. Canned salmon may contain more moisture than fresh cubes, so reduce the mayonnaise slightly if the mixture looks particularly wet.
Why are my salmon sushi cups soggy?
Hot rice, excessive sauce, overfilling, or watery salmon are the most common causes. Cool the rice and keep the salmon lightly coated rather than overly saucy.
Can I prepare them ahead of time?
Prepare the rice, sauce, and toppings ahead, but assemble shortly before baking. Nori gradually softens against moist rice, so last-minute assembly produces better texture.
Can I make salmon sushi cups in an air fryer?
Yes, provided your muffin molds fit safely inside. Cook them in batches and check early because concentrated airflow can brown exposed rice and nori faster.
What rice works best?
Short-grain Japanese sushi rice is ideal because it naturally sticks together. Medium-grain rice can also work, while long-grain varieties are more likely to crumble.
What can I serve with them?
Pair them with cucumber salad, edamame, miso soup, seaweed salad, or pickled vegetables. Fresh sides balance the creamy salmon filling without making the meal feel too heavy.
Tried it before ?
There are no reviews yet. Be the first one to write one.