
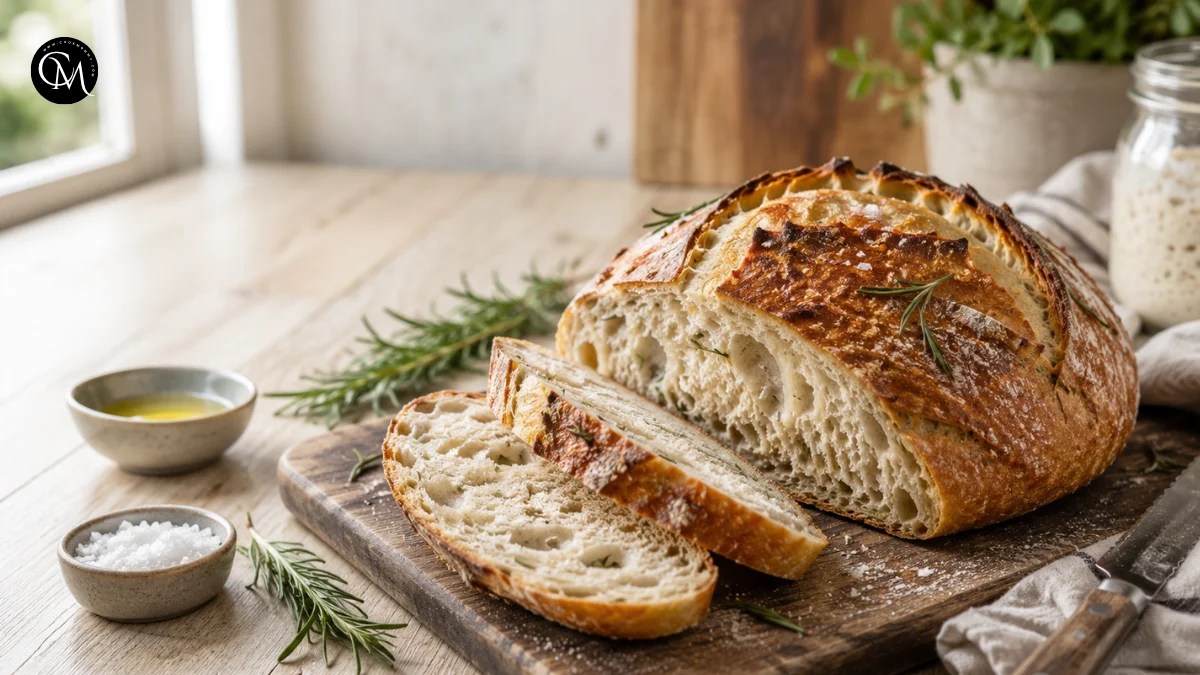
Sourdough Bread with Aromatic Rosemary: 5 Best Tips
Can four basic ingredients flour, water, salt, and starter really create a loaf with a crisp crust, tender crumb, and layers of flavor? Yes, especially when fermentation and rosemary work together. Sourdough Bread develops its character slowly: natural yeast creates lift, friendly acids add tang, and baking transforms the dough into a deeply aromatic loaf.
This recipe is worth learning because it offers bakery-style results at home. The method focuses on five dependable habits: use an active starter, weigh the ingredients, strengthen the dough gently, judge fermentation by appearance, and cool the loaf completely. Follow those principles and your Sourdough Bread will be easier to shape, score, and bake.
Table of Contents
Ingredients List
For one medium round loaf:
- 100 g active sourdough starter
- 350 g lukewarm water
- 500 g bread flour
- 10 g fine sea salt
- 1½ tablespoons fresh rosemary, finely chopped
- 1 tablespoon extra-virgin olive oil
- 1 teaspoon honey, optional
- Flaky sea salt for topping, optional
- Rice flour or bread flour for dusting
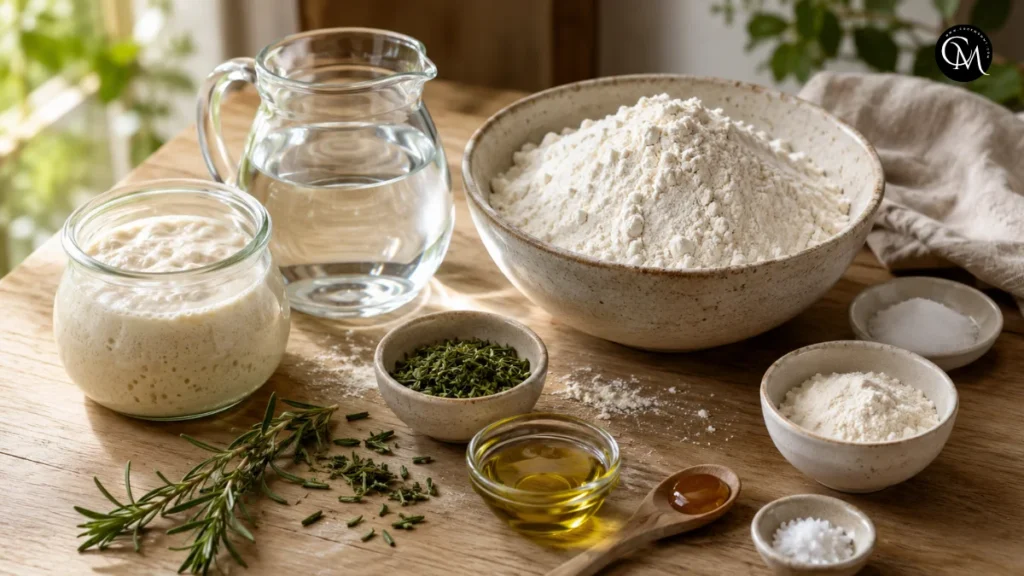
Bread flour gives Sourdough Bread stronger structure and a chewier crumb. All-purpose flour can replace it, although the loaf may spread a little more. Fresh rosemary gives the brightest aroma. Use about 1½ teaspoons dried rosemary when fresh herbs are unavailable, crushing it between your fingers first.
Honey is optional; it softens the herb’s sharper notes without making the bread noticeably sweet. Olive oil adds tenderness and helps distribute rosemary’s aroma through the dough.
Timing
- Active preparation: 35 minutes
- Bulk fermentation: 4–6 hours
- Cold proof: 8–14 hours
- Baking: 40–45 minutes
- Cooling: At least 1 hour
- Total elapsed time: About 14–22 hours
Most of this schedule is hands-off. Sourdough Bread takes longer than a commercial-yeast loaf, but slow fermentation creates fuller flavor and a crust that stays appealing after baking.
Step-by-Step Instructions
Step 1 – Prepare Ingredients
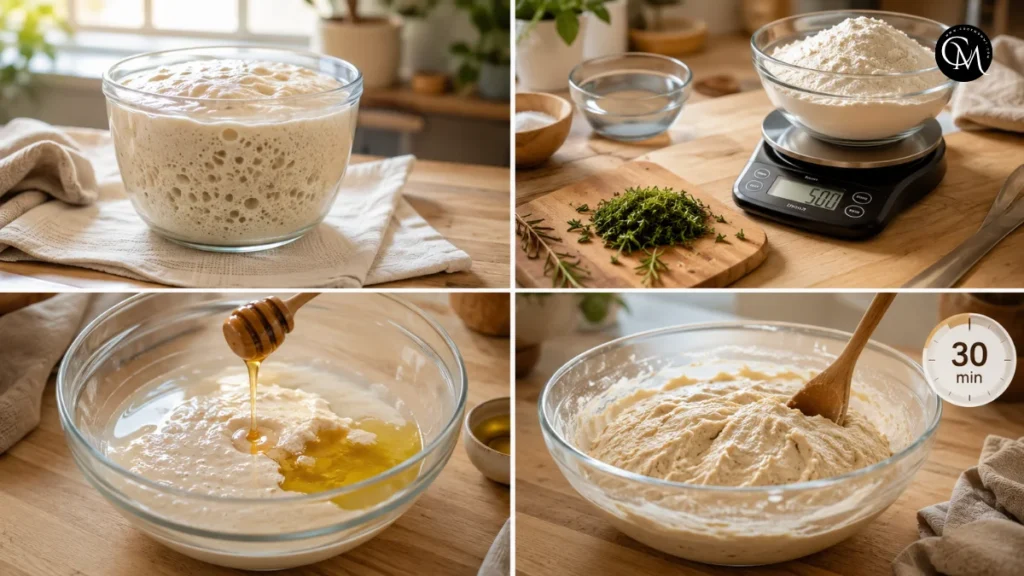
Feed the starter several hours before mixing. It should rise clearly, show bubbles, and smell pleasantly tangy. A float test can be helpful, but visible activity is more reliable.
Use a kitchen scale. Flour measured in cups can vary enough to change the dough’s texture, while grams keep the hydration consistent. Finely chop the rosemary so no tough needles interrupt the crumb.
Stir the starter, water, olive oil, and honey in a large bowl. Add the flour and mix until no dry patches remain. Cover and rest for 30 minutes. This short rest lets the flour absorb water and begins gluten development before salt is added.
Step 2 – Build the Flavor Base
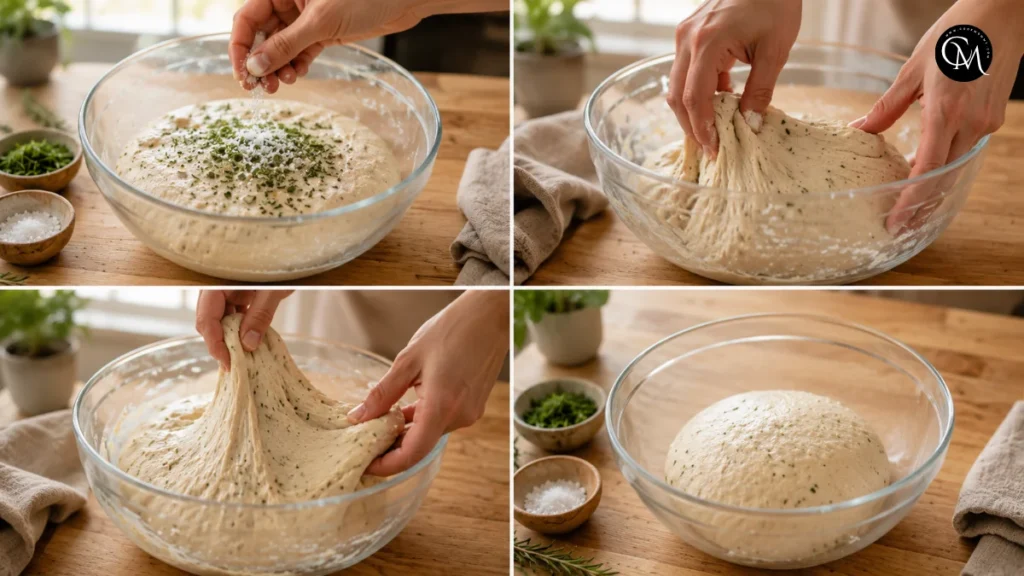
Sprinkle the salt and rosemary over the dough. Pinch and fold until both are evenly distributed. Salt seasons Sourdough Bread, strengthens gluten, and slows fermentation enough to keep the dough manageable.
Rosemary should be spread throughout the loaf rather than gathered in strong-tasting pockets. Its essential oils are powerful, so measured restraint creates a more balanced flavor.
Complete three or four sets of stretch-and-folds at 30-minute intervals. Lift one side of the dough, stretch it gently, and fold it toward the center. Rotate the bowl and repeat. This develops strength without heavy kneading.
Step 3 – Ferment the Main Dough
After the final fold, cover the bowl and leave it at room temperature. Look for a 30–50% increase in volume rather than waiting for the dough to double. The surface should look slightly rounded, with bubbles along the sides and a soft, elastic feel.
Temperature matters. At about 25°C, Sourdough Bread dough may finish bulk fermentation in four hours. In a cooler kitchen, it may need six hours or longer. Watch the dough, not only the clock.
Press it gently with a damp finger. Dough that springs back immediately may need more time. Dough that feels airy and returns slowly is usually ready. If it collapses and feels very loose, it may have fermented too long.
Step 4 – Combine and Shape Everything
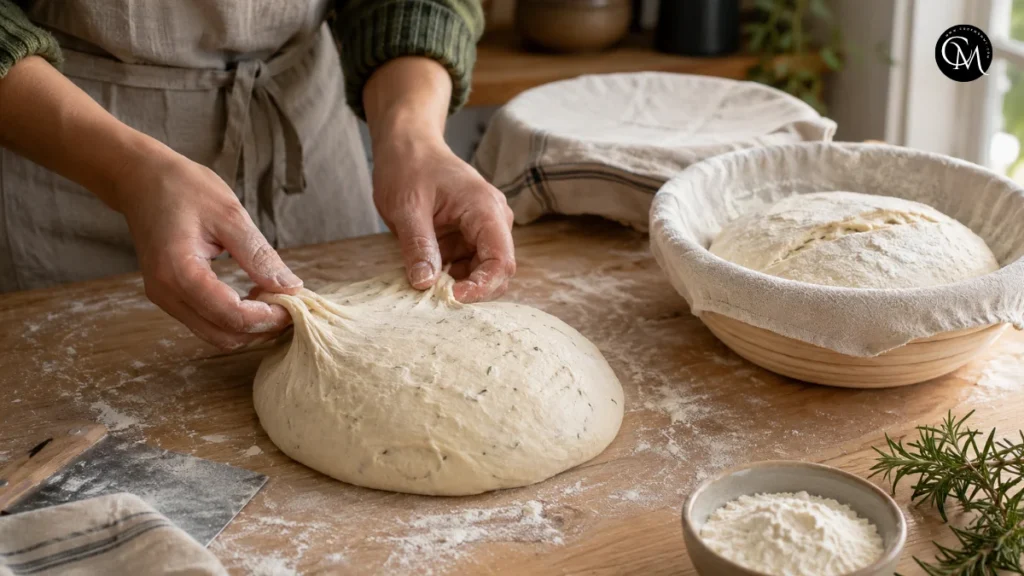
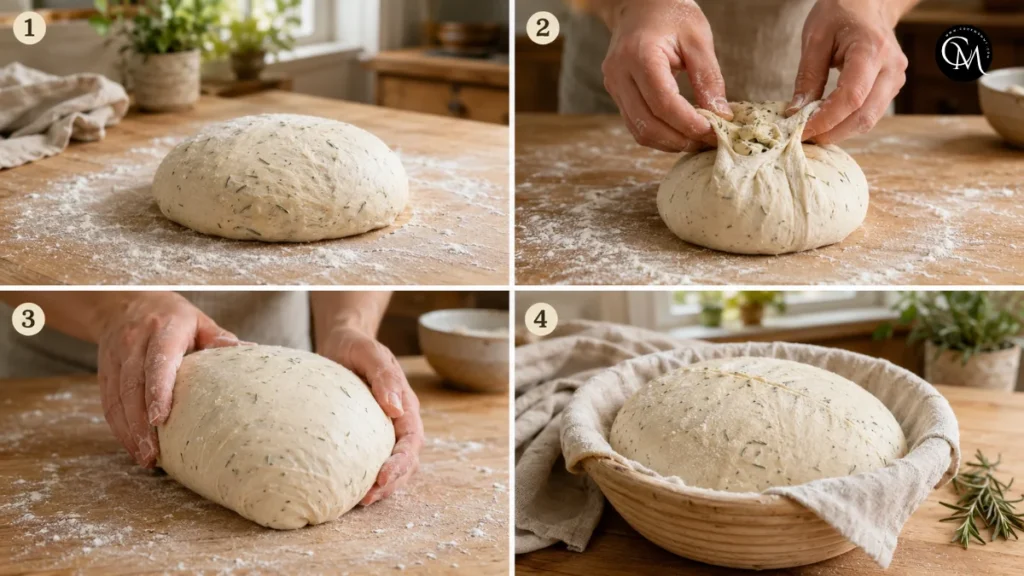
Turn the dough onto a lightly floured counter. Shape it loosely into a round and let it rest uncovered for 15–20 minutes. This bench rest relaxes the gluten and makes final shaping easier.
Pull the edges toward the center, turn the dough over, and drag it gently across the counter to create surface tension. Avoid pressing out all the gas. Those bubbles help give Sourdough Bread its light interior.
Place the loaf seam-side up in a floured proofing basket or towel-lined bowl. Cover and refrigerate for 8–14 hours. Cold proofing deepens flavor, firms the dough for scoring, and allows the rosemary to taste integrated rather than separate.
Step 5 – Bake and Finish
Place a Dutch oven inside the oven and preheat to 245°C for at least 40 minutes. The hot covered pot traps steam, delays crust formation, and gives Sourdough Bread time to expand.
Turn the cold dough onto parchment paper. Score the top with one confident cut about 1 cm deep. Mist lightly with water and add flaky salt if desired.
Bake covered for 20 minutes. Reduce the heat to 225°C, remove the lid, and bake for another 20–25 minutes. The crust should be golden. An internal temperature near 96°C generally means the center is baked.
Cool on a rack for at least one hour. Cutting too early releases steam and can make the crumb gummy. Taste the first slice plain, then decide whether your next Sourdough Bread needs more rosemary, salt, or fermentation time.
Nutritional Information
Approximate values per slice, based on 12 slices:
- Calories: 185
- Carbohydrates: 35 g
- Protein: 6 g
- Fat: 2.5 g
- Fiber: 1.5 g
- Sodium: 325 mg
Values vary with slice size and substitutions. Sourdough Bread is mainly a carbohydrate food, so pair it with vegetables, eggs, beans, cheese, or another protein for a more balanced meal.
Healthier Alternatives
- For a whole-grain loaf, replace 100–150 g of bread flour with whole-wheat flour and add 10–20 g extra water. Whole grains absorb more moisture, and that small adjustment protects the crumb from dryness.
- Sourdough Bread is already low in added sugar; simply omit the honey for an unsweetened version. It is naturally dairy-free as written.
- A gluten-free loaf requires a tested gluten-free sourdough formula rather than a direct flour swap because gluten-free dough needs different hydration and binding ingredients.
- For children, reduce the rosemary slightly and skip the salt topping. For seniors who prefer a softer crust, wrap the fully cooled Sourdough Bread in a clean towel for several hours. For lighter meals, serve thin slices with soup, grilled vegetables, or a protein-rich topping.
Serving Suggestions
Enjoy Sourdough Bread with butter, olive oil, goat cheese, tomato soup, roasted vegetables, white bean stew, or scrambled eggs. For lunch, toast a slice and add ricotta, tomatoes, black pepper, and olive oil.
For breakfast, top it with avocado and an egg. Slightly stale slices make excellent croutons, garlic toast, or rustic bread salad. My favorite method is to toast a thick slice, rub it lightly with cut garlic, and finish it with olive oil.
Common Mistakes to Avoid
- Using a weak starter: Feed it until it rises predictably.
- Adding too much rosemary: Excess herbs can taste bitter or medicinal.
- Over-flouring during shaping: This can create dry streaks and weak tension.
- Waiting for the dough to double: Many loaves become over-fermented before that point.
- Underheating the Dutch oven: A cool pot reduces oven spring.
- Cutting while hot: The crumb is still setting and may turn sticky.
Storing Tips for the Recipe
- Keep cooled Sourdough Bread cut-side down on a wooden board for the first day. Then use a bread box, paper bag, or reusable bag. Avoid refrigeration because it speeds up staling.
- For longer storage, slice and freeze Sourdough Bread in an airtight bag for up to three months. Toast slices directly from frozen. To refresh a whole loaf, mist the crust with water and heat it at 180°C for 8–10 minutes.
- This recipe became one of my regular meals because one loaf works naturally for breakfast, lunch, soup nights, and quick snacks without feeling repetitive.
Conclusion
Sourdough Bread with rosemary combines simple ingredients with techniques that build real flavor. An active starter provides lift, gentle folds strengthen the dough, slow fermentation adds complexity, and rosemary gives every slice an herbal aroma. The most important lessons are to weigh accurately, follow the dough rather than the clock, preheat thoroughly, and allow the loaf to cool.
Try this Sourdough Bread recipe and adjust the rosemary to match your taste. After baking, leave a comment or review sharing your fermentation time and crumb texture. Subscribe for more bread recipes, variations, and baking tips that make each loaf more dependable.
FAQs
Can I use dried rosemary?
Yes. Use about 1½ teaspoons, crush it finely, and distribute it evenly to avoid tough or strongly flavored pockets.
Why is my loaf dense?
Common causes include a weak starter, under-fermentation, excessive flour, or rough shaping that removes too much gas.
Can I skip the overnight proof?
Yes. Proof at room temperature until puffy, then bake. The flavor may be milder and scoring slightly harder.
Do I need a Dutch oven?
No. Use a preheated baking stone or tray and create steam with a separate hot pan of water.
How do I know it is baked?
Look for a dark golden crust, a hollow sound underneath, and an internal temperature close to 96°C.
Can I add garlic or cheese?
Yes. Add roasted garlic or firm grated cheese during the final fold, keeping the amount moderate.
How long should it cool?
Cool for at least one hour, preferably two, so moisture settles and the interior does not become gummy.
Tried it before ?
There are no reviews yet. Be the first one to write one.